If you are new to cubing, the easiest way to solve a 3x3 Rubik’s Cube is
the layer-by-layer method. You solve the first layer,
then the middle layer, and finally the last layer.
This guide is written for beginners who want clear steps, simple goals,
and easy-to-follow algorithms.
Step 1: Make the Bottom Cross
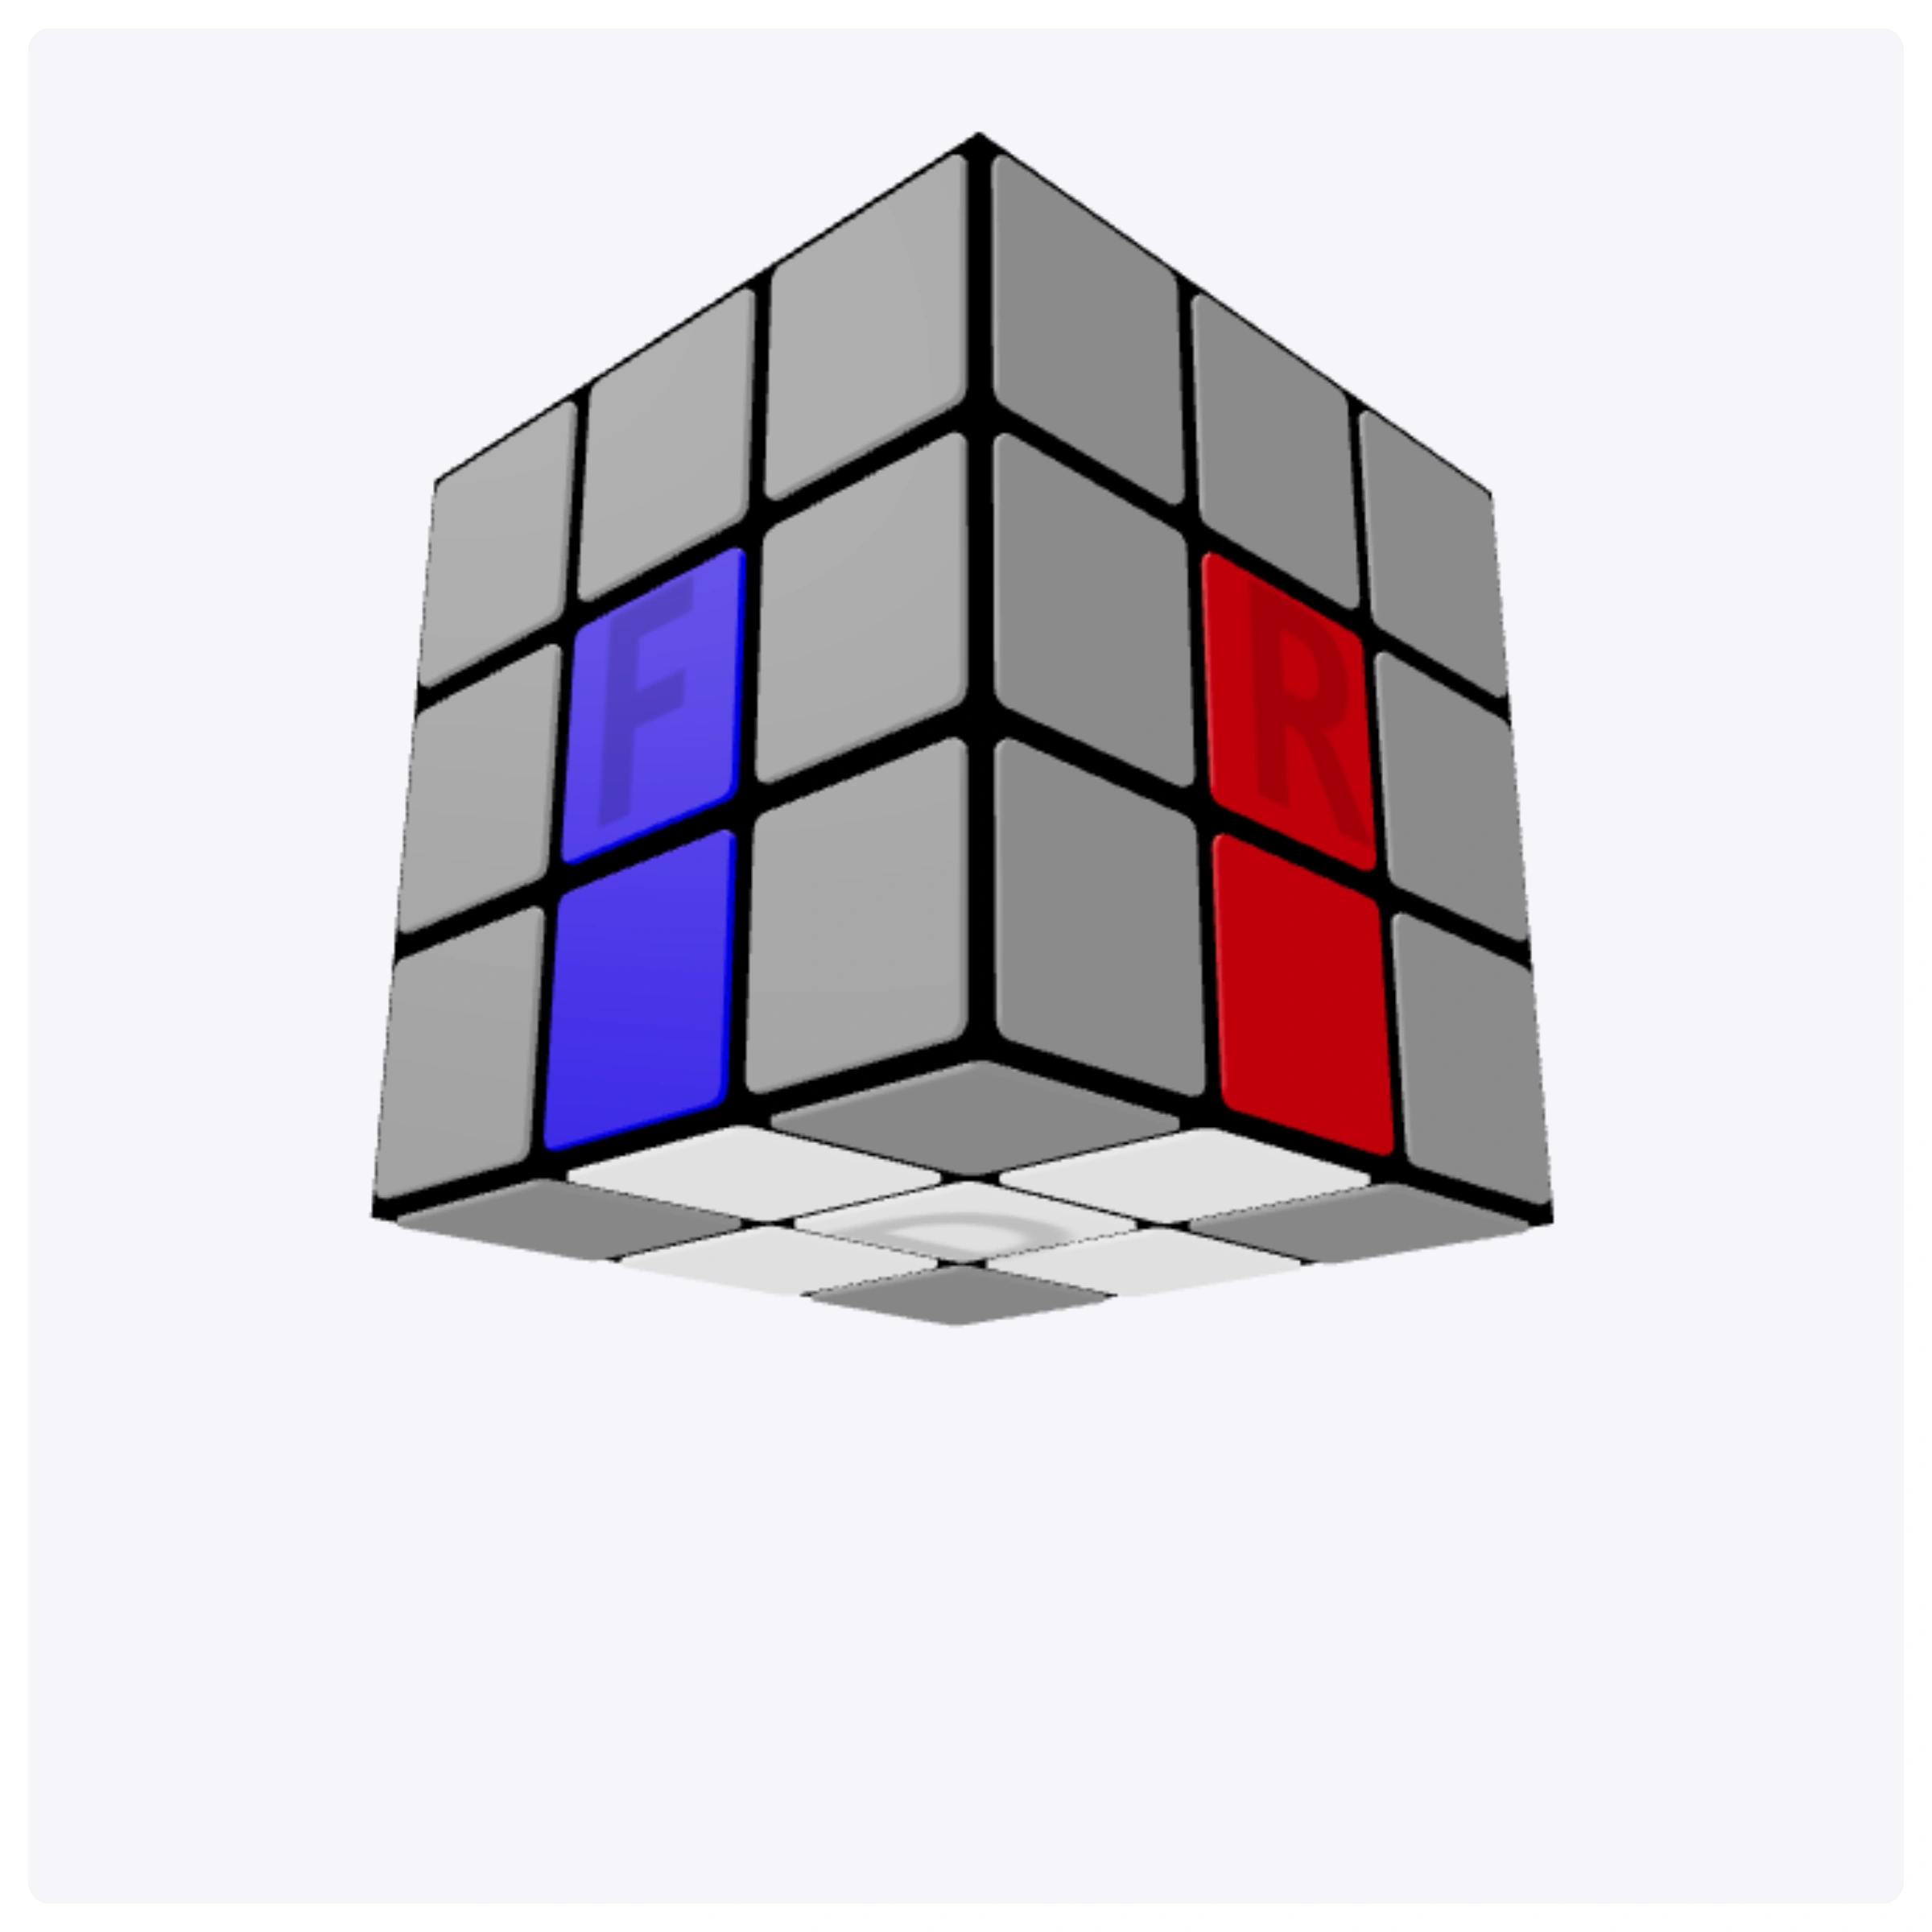
Start by solving the cross on the bottom layer. Your goal is not only
to place four edge pieces around the bottom center, but also to make
sure the side colors match the center pieces on each side.
For example, if you are solving the white cross, each white edge should
connect to the correct side center color. This is the foundation of the
entire solve, so take your time here.
Step 2: Solve the Bottom Corners
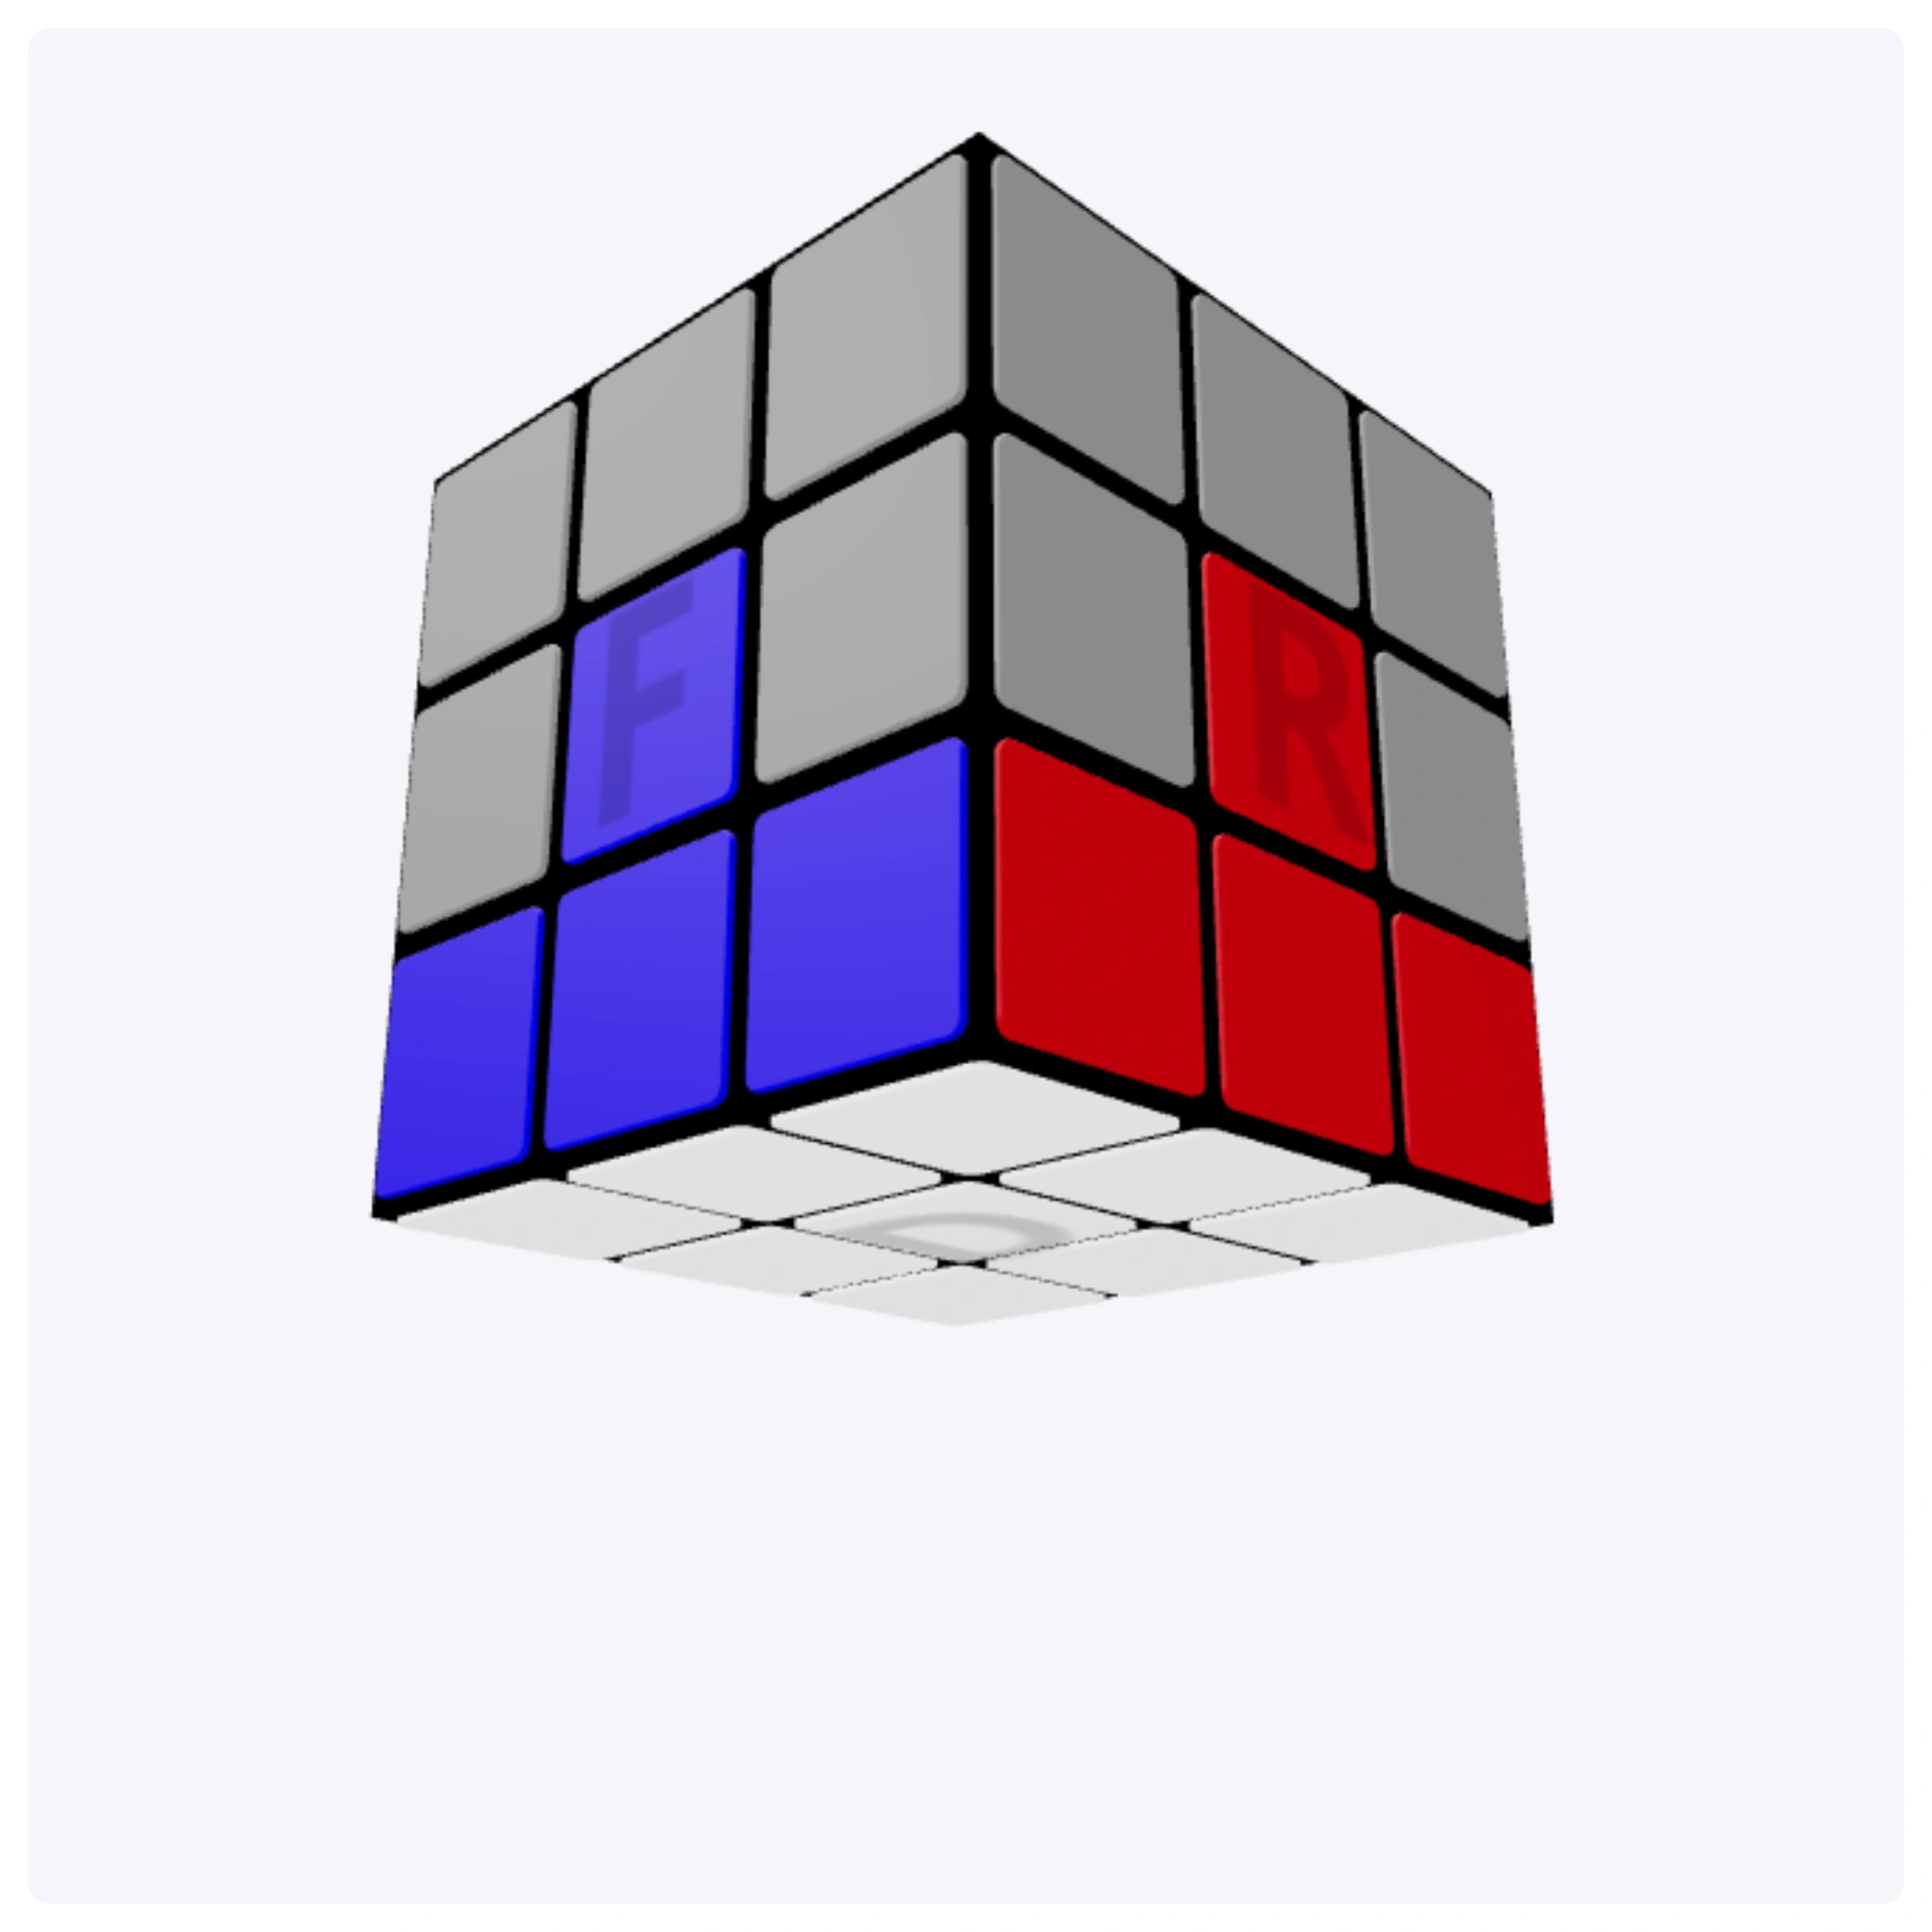
Next, insert the four corner pieces into the bottom layer. Each corner
has three colors, so make sure all three stickers match the surrounding
center colors.
After this step, the entire first layer should be solved.
Step 3: Solve the Middle Layer Edges
Now look for edge pieces in the top layer that do not contain the top
color. These edges belong in the middle layer.
Match the front color of the edge with the same-colored center, then
use the correct algorithm depending on where the edge needs to go.
Case 1: Insert the edge into one side
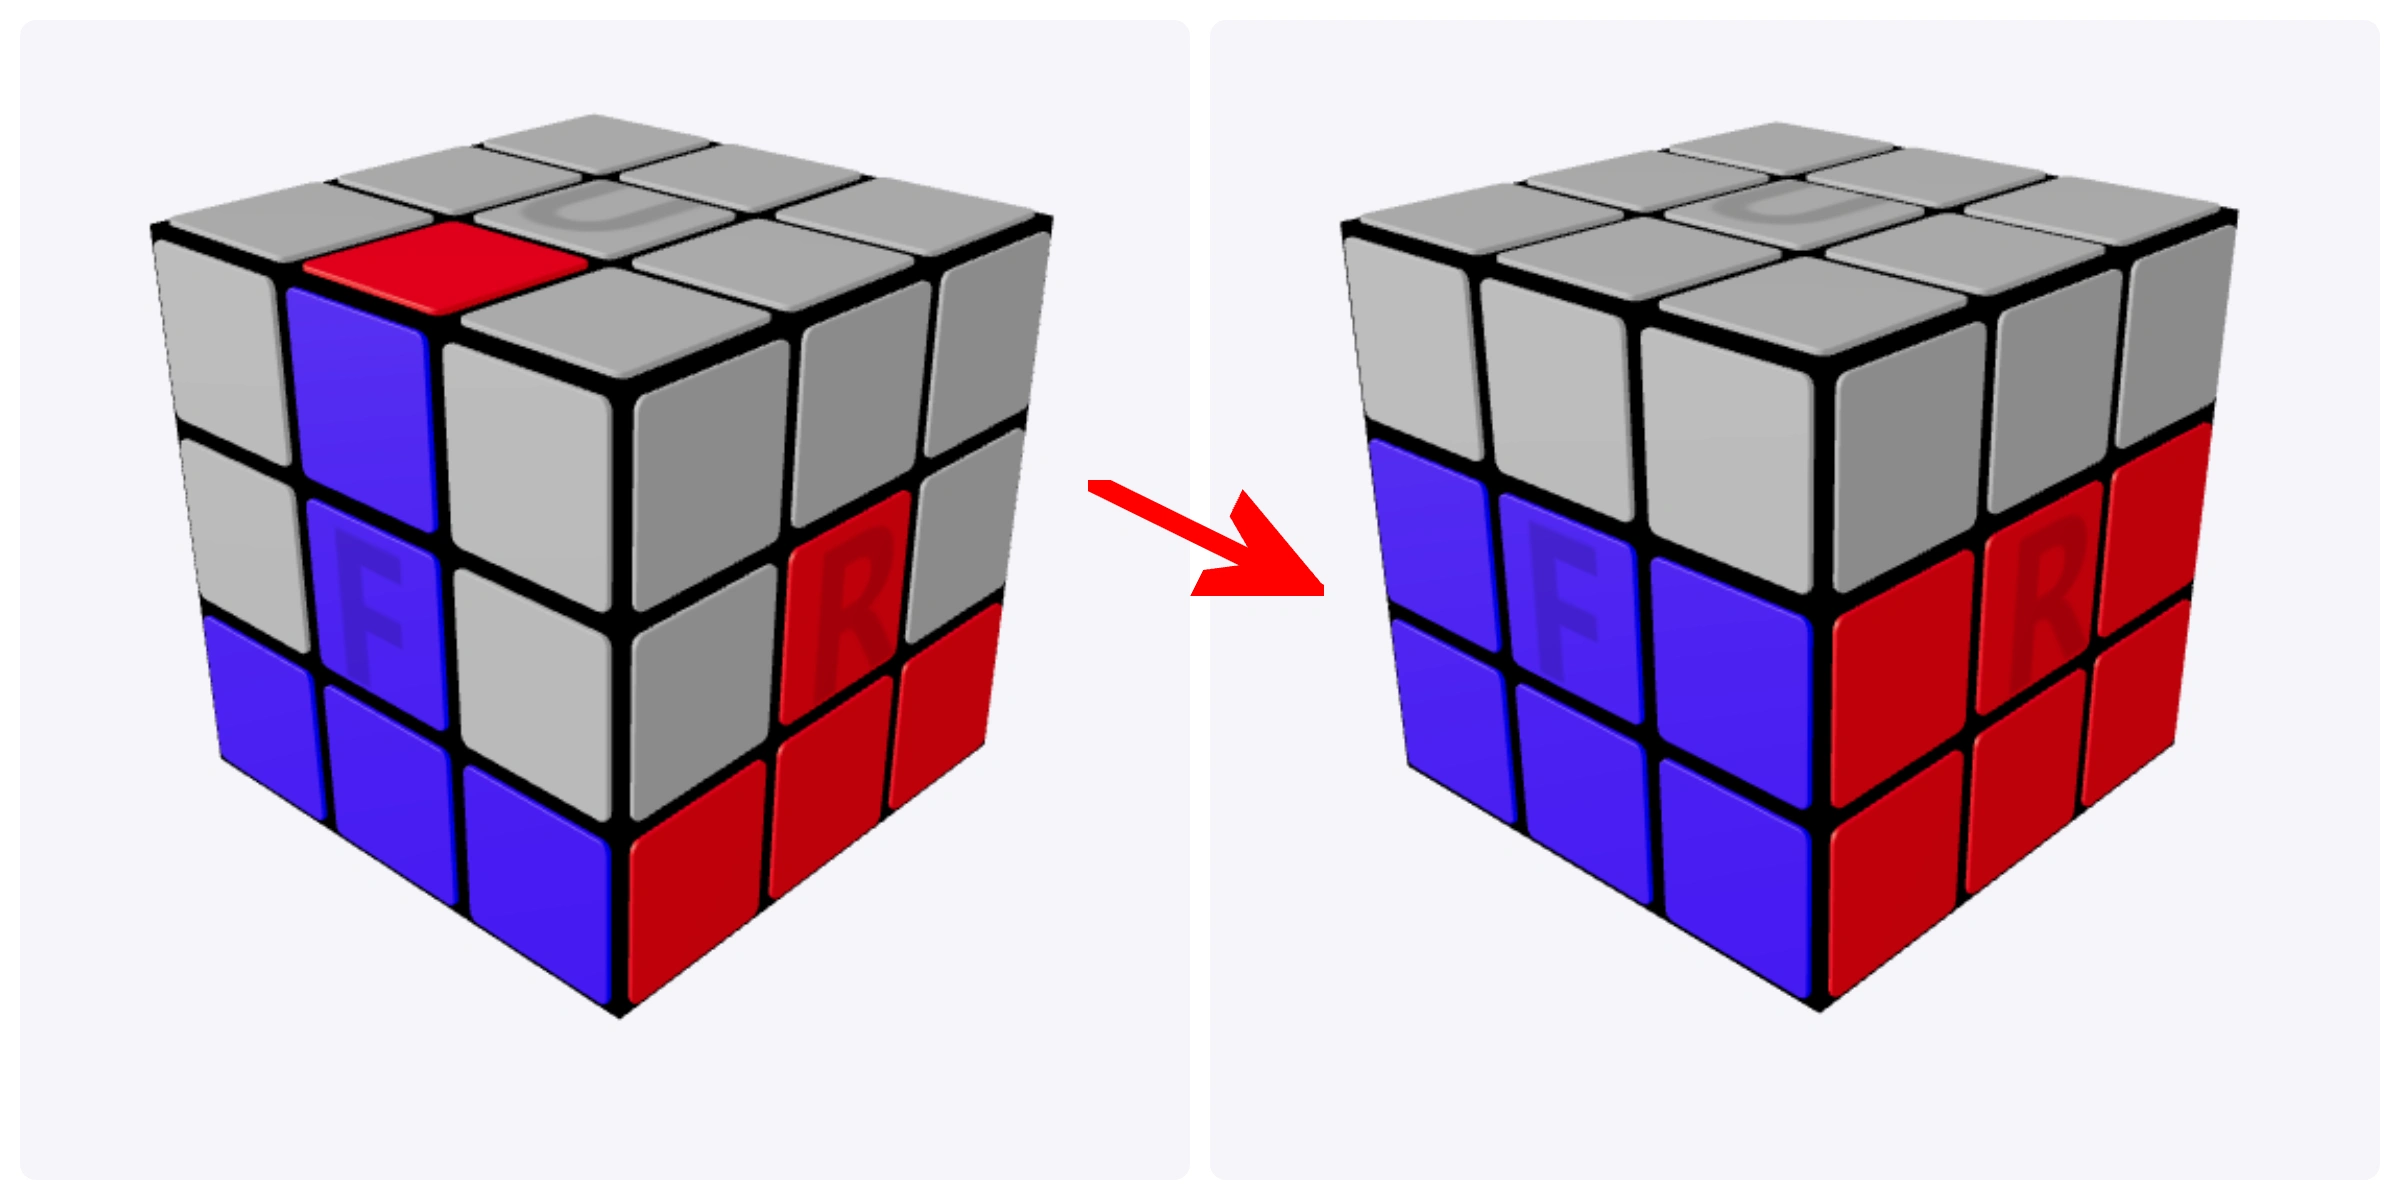
Use this algorithm:
F U F U F U' F' U' F'
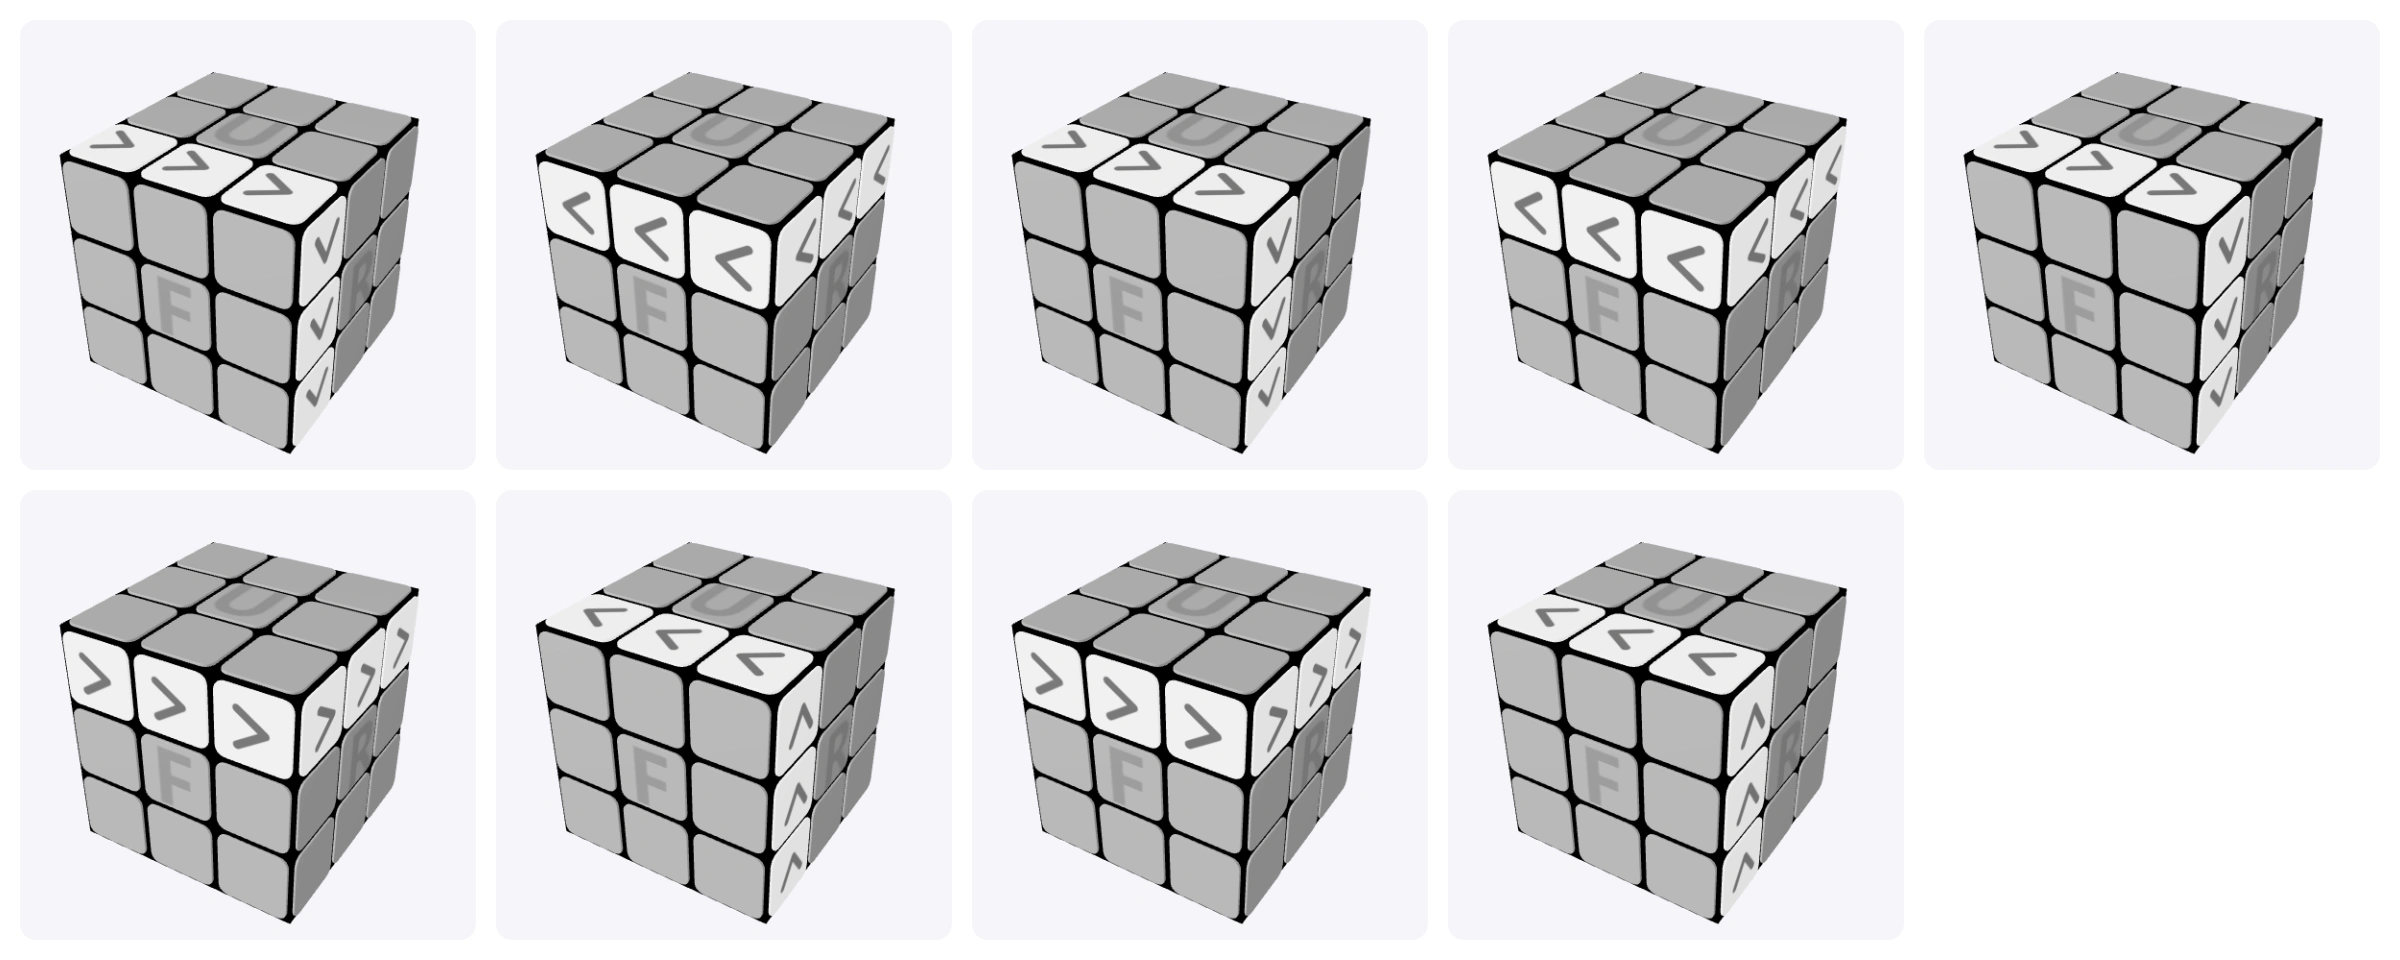
Case 2: Insert the edge into the other side
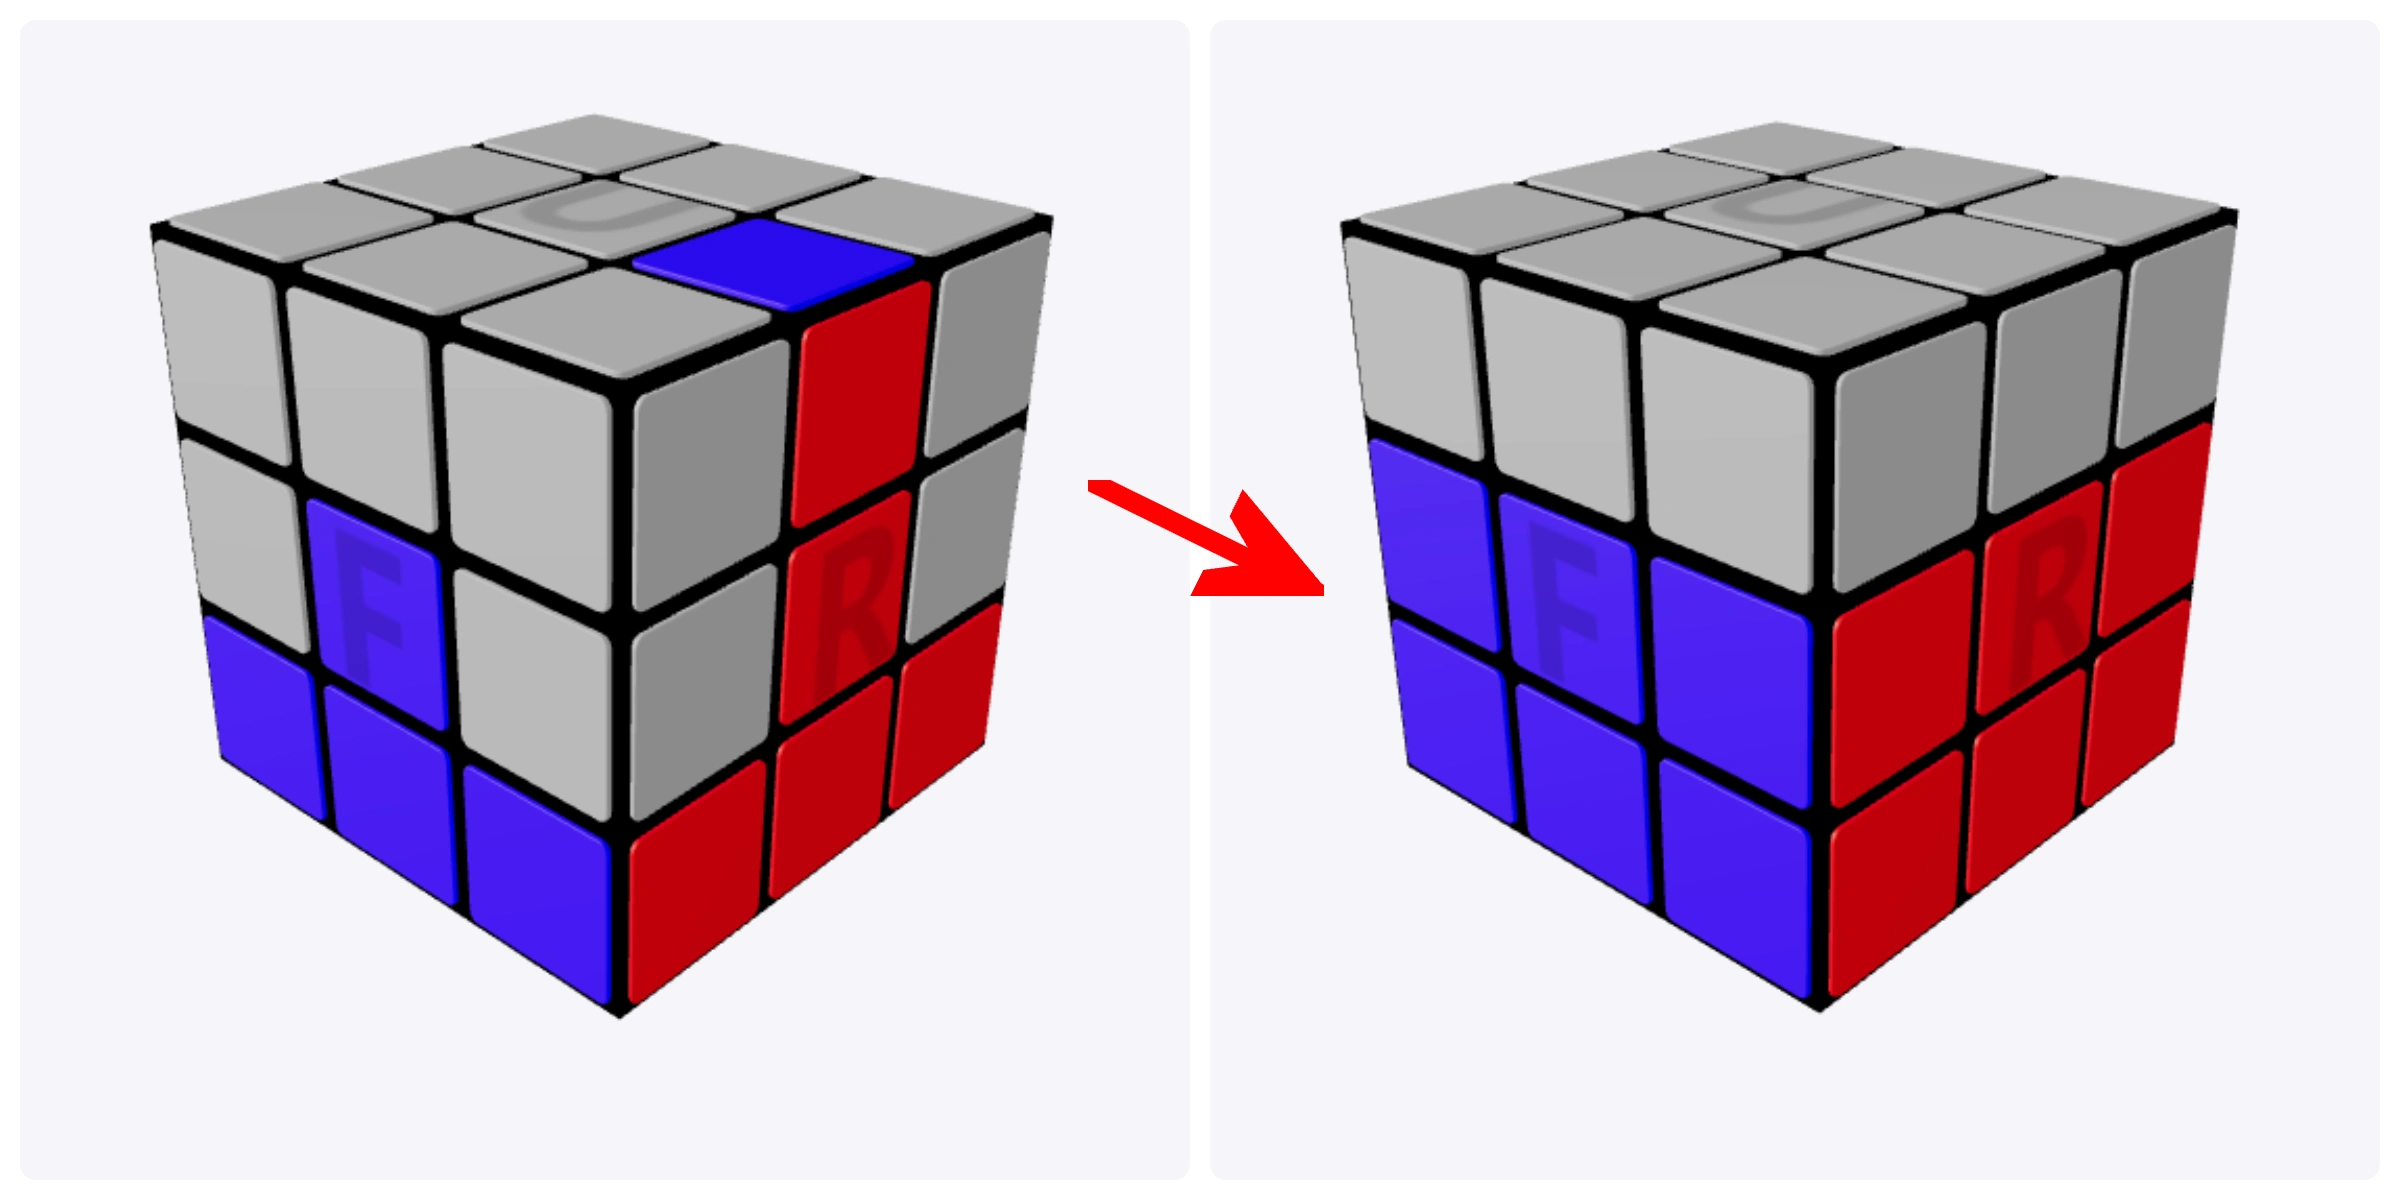
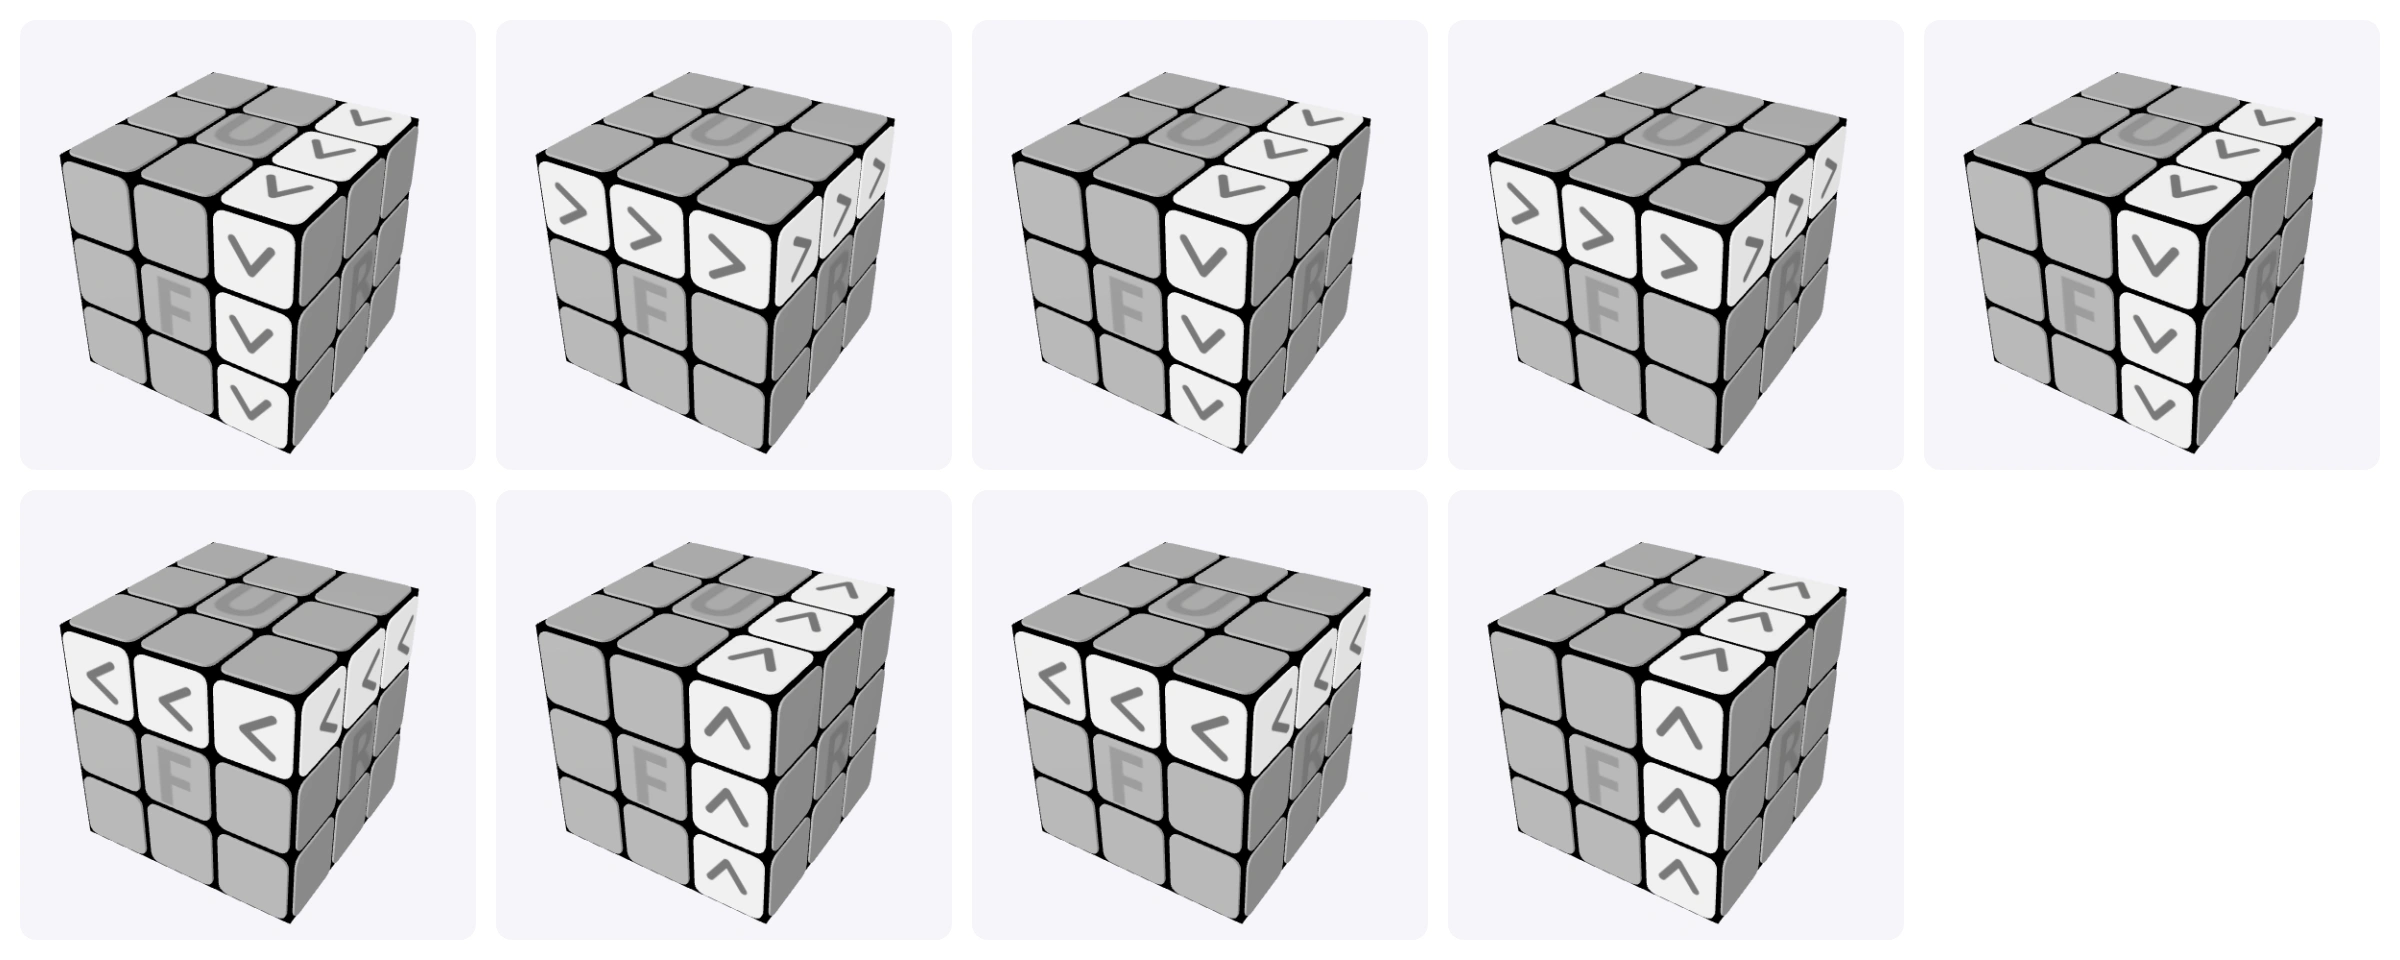
Use this algorithm:
R' U' R' U' R' U R U R
Case 3: Edge is stuck in the wrong middle-layer slot
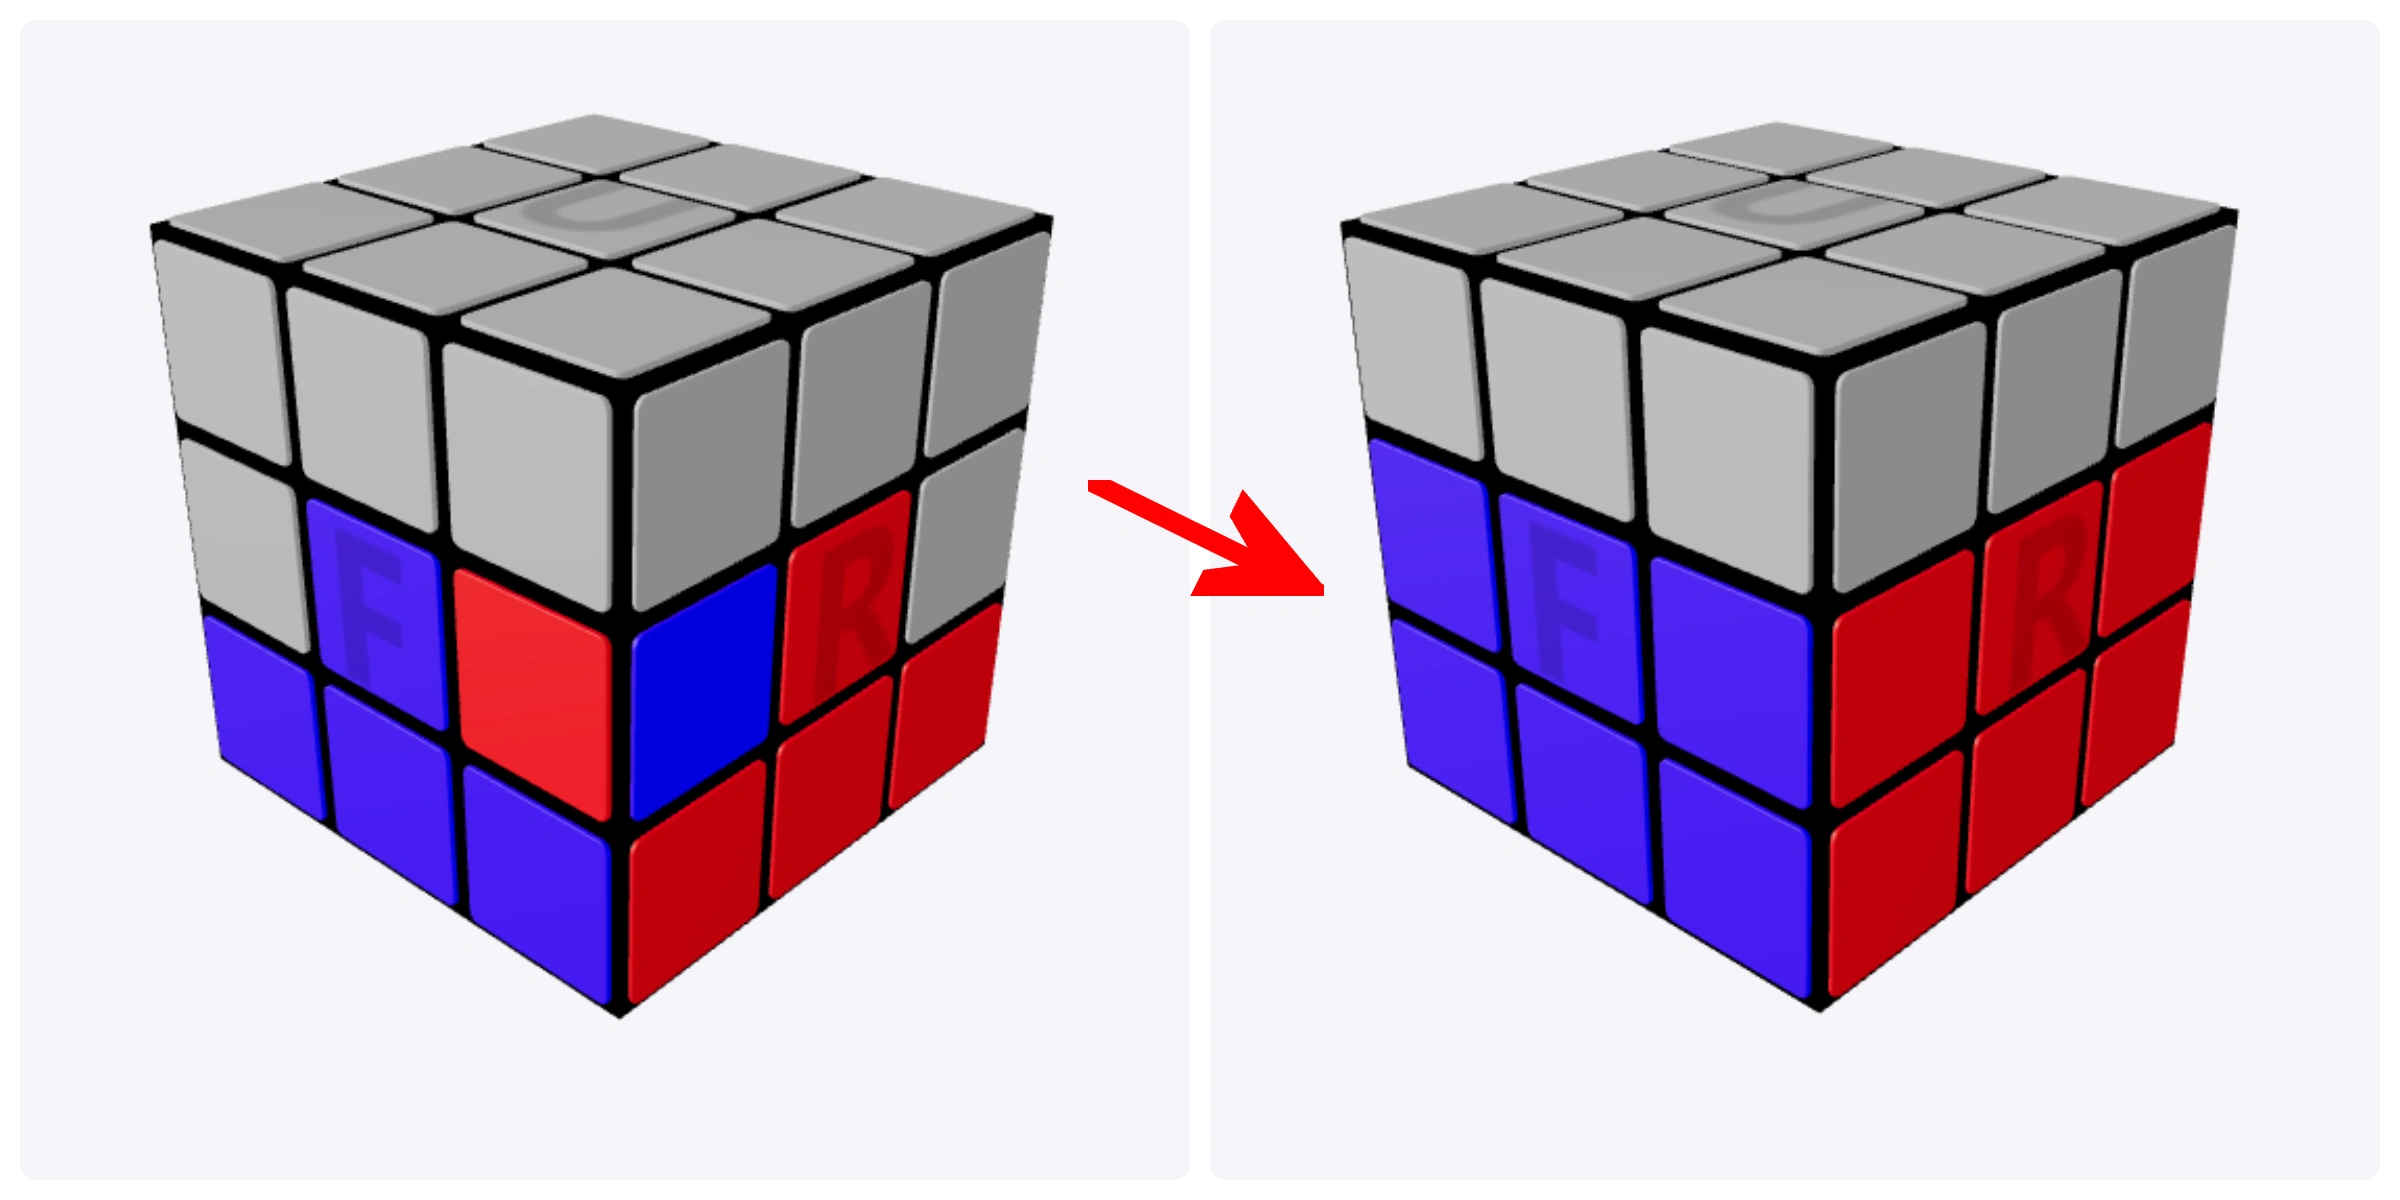
If an edge is already in the middle layer but in the wrong place or
flipped the wrong way, use this algorithm to take it out and try again:
R U2 R' U R U2 R' U F' U' F
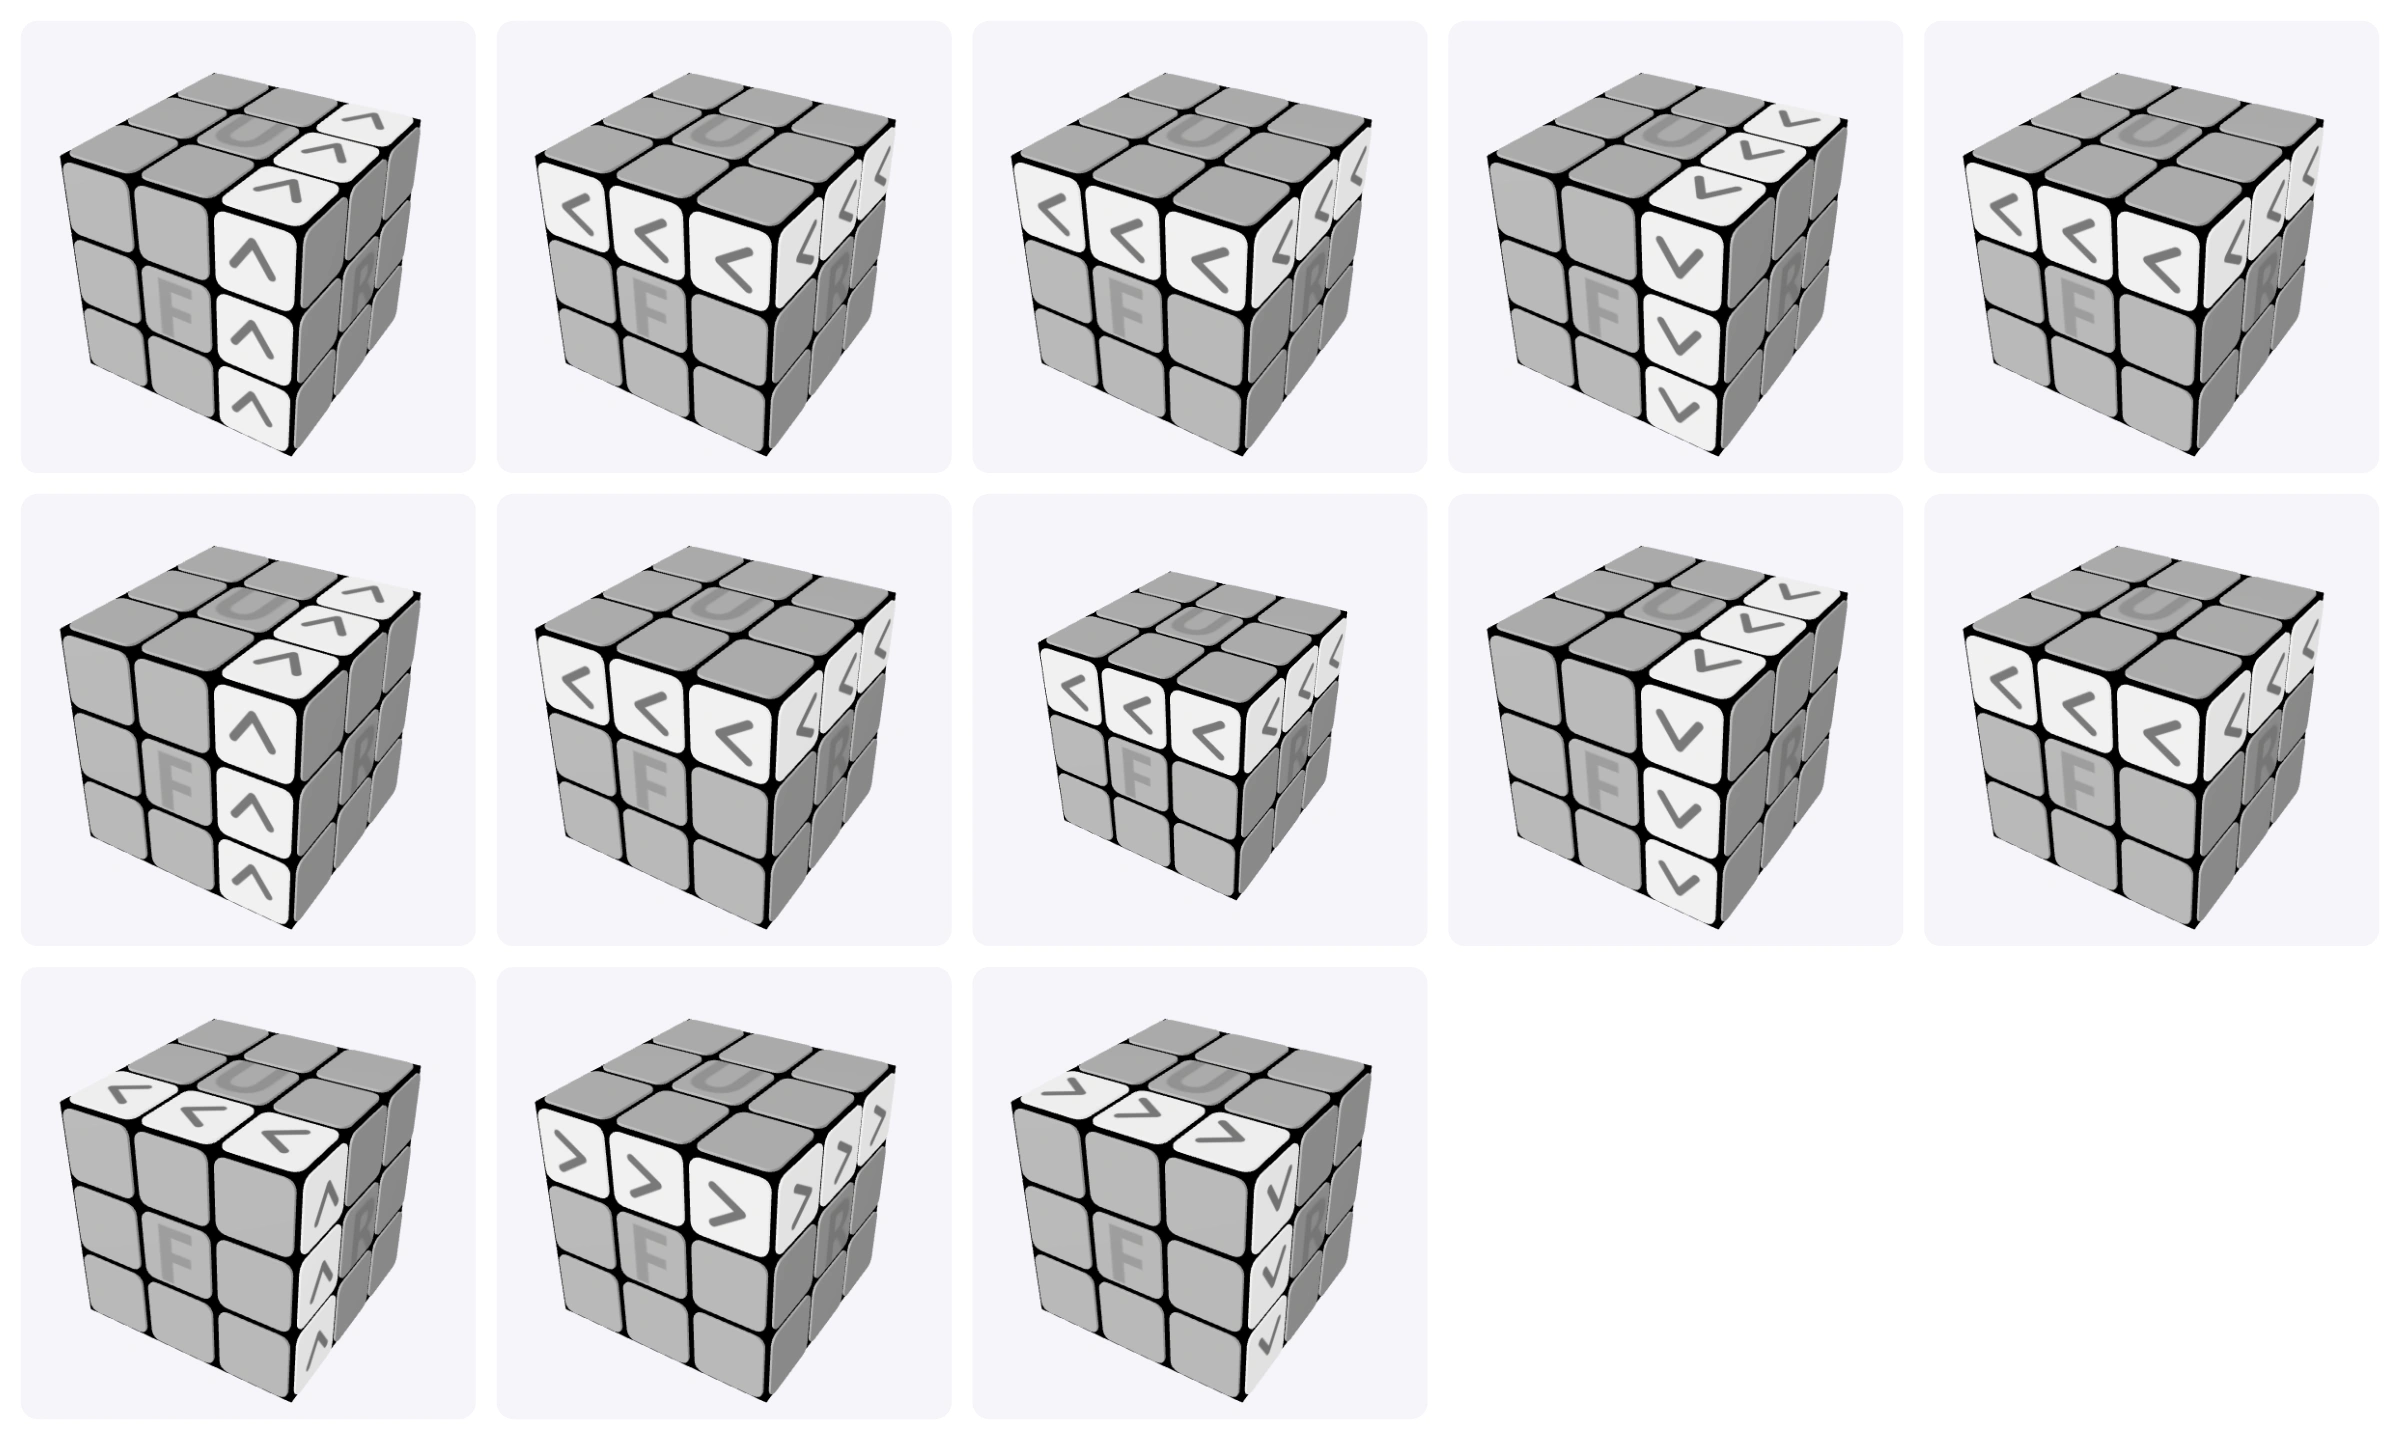
When this step is finished, the first two layers should be complete.
Step 4: Make the Top Cross
At this point, focus only on the top color. Your goal is to create a
cross on the top face.
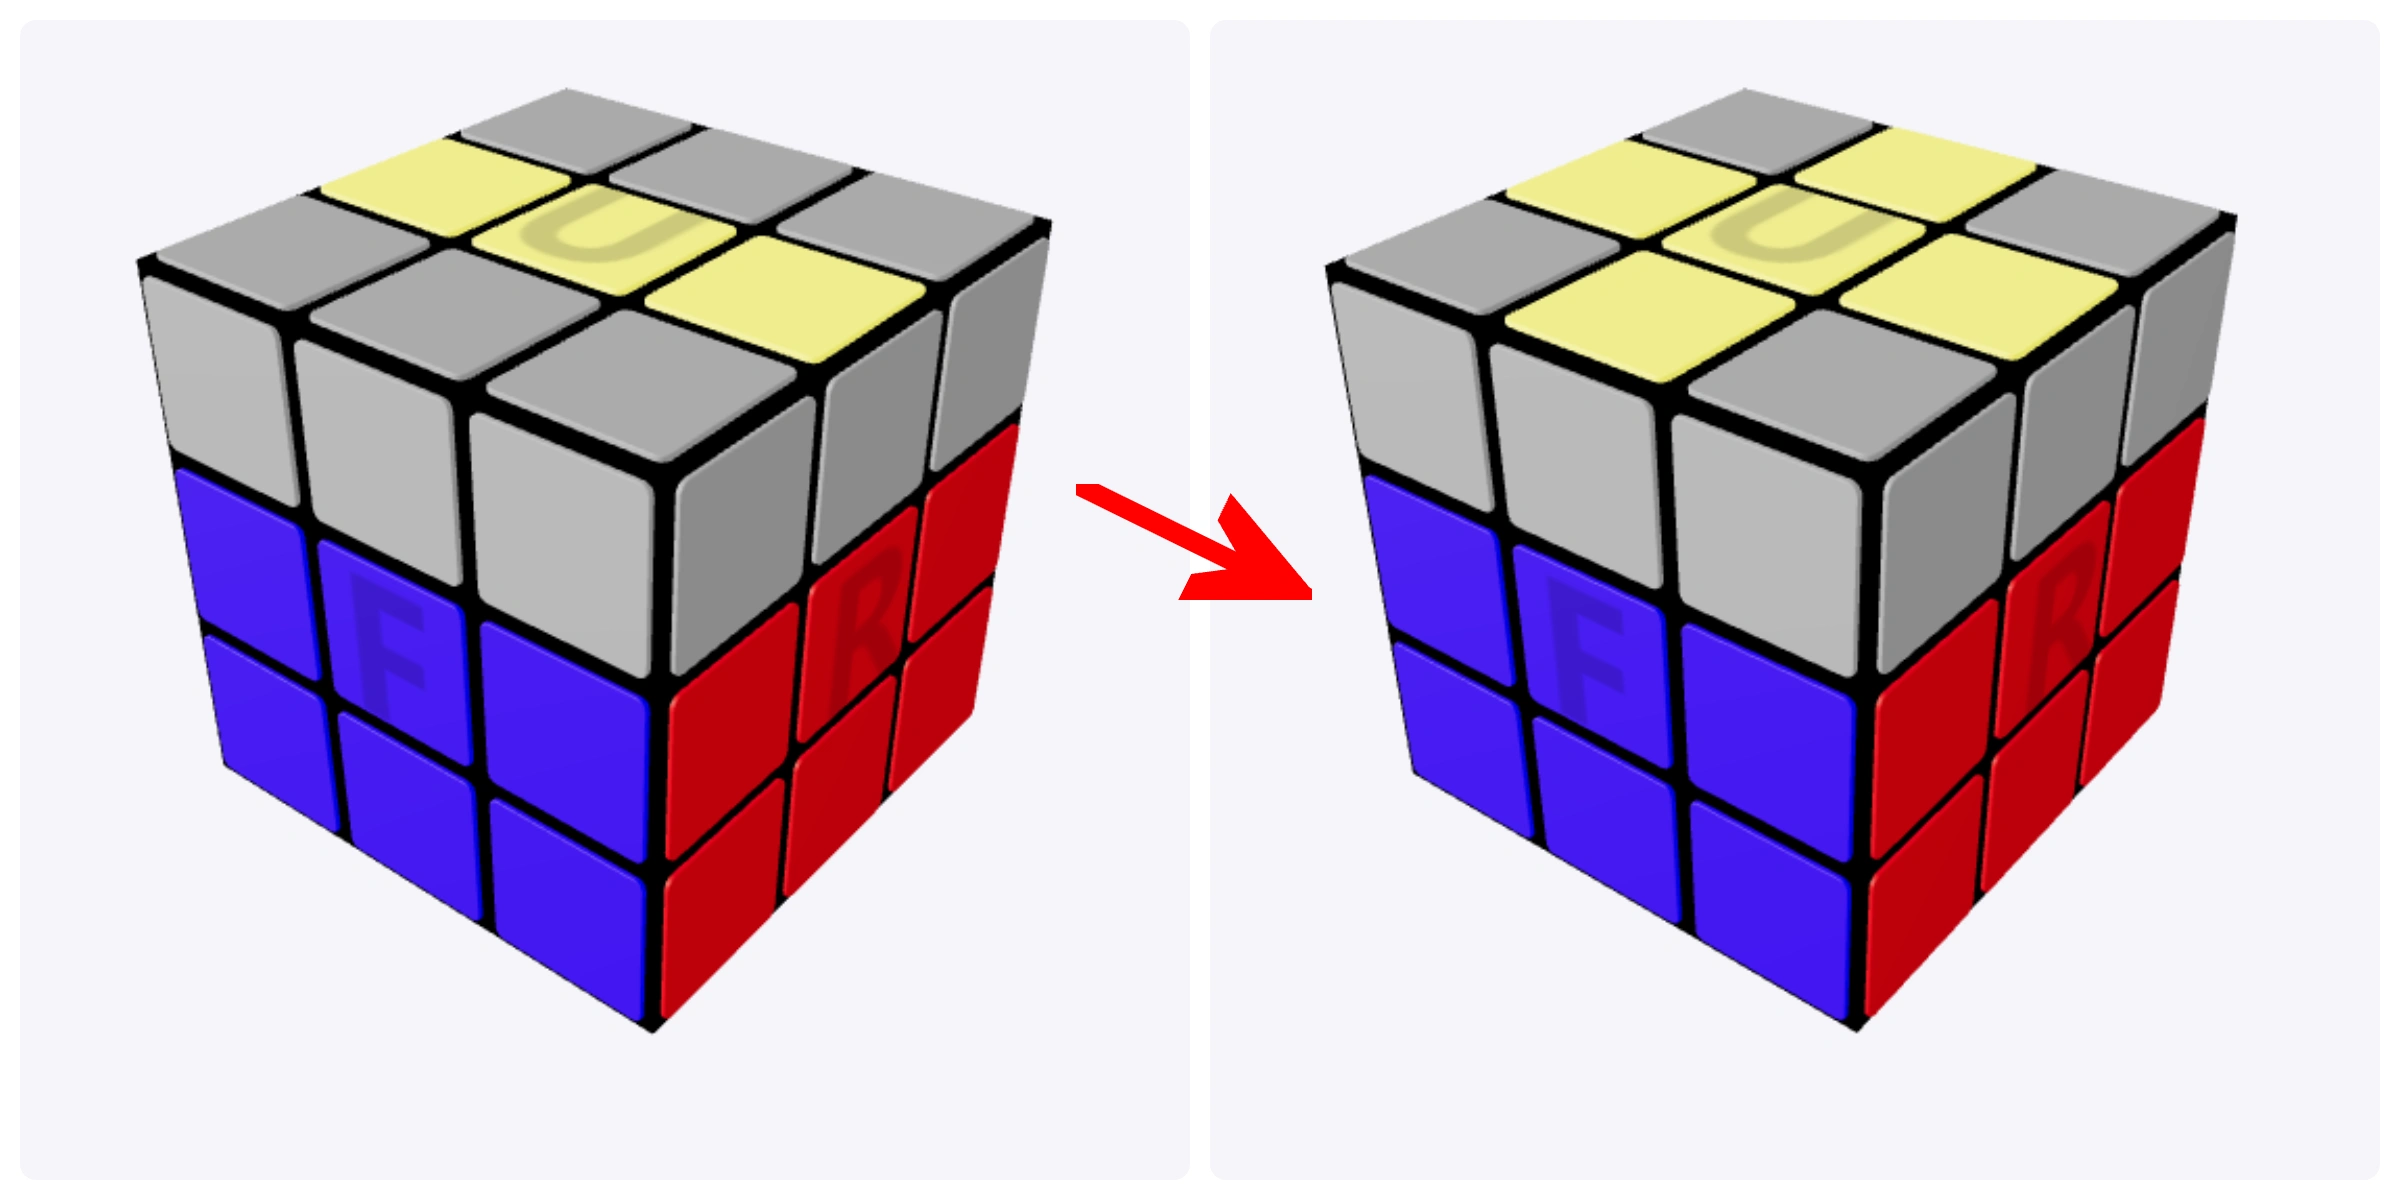
You may see a dot, an L-shape, a line, or already have a cross. Use the
same algorithm until the top cross is formed:
F R U R' U' F'
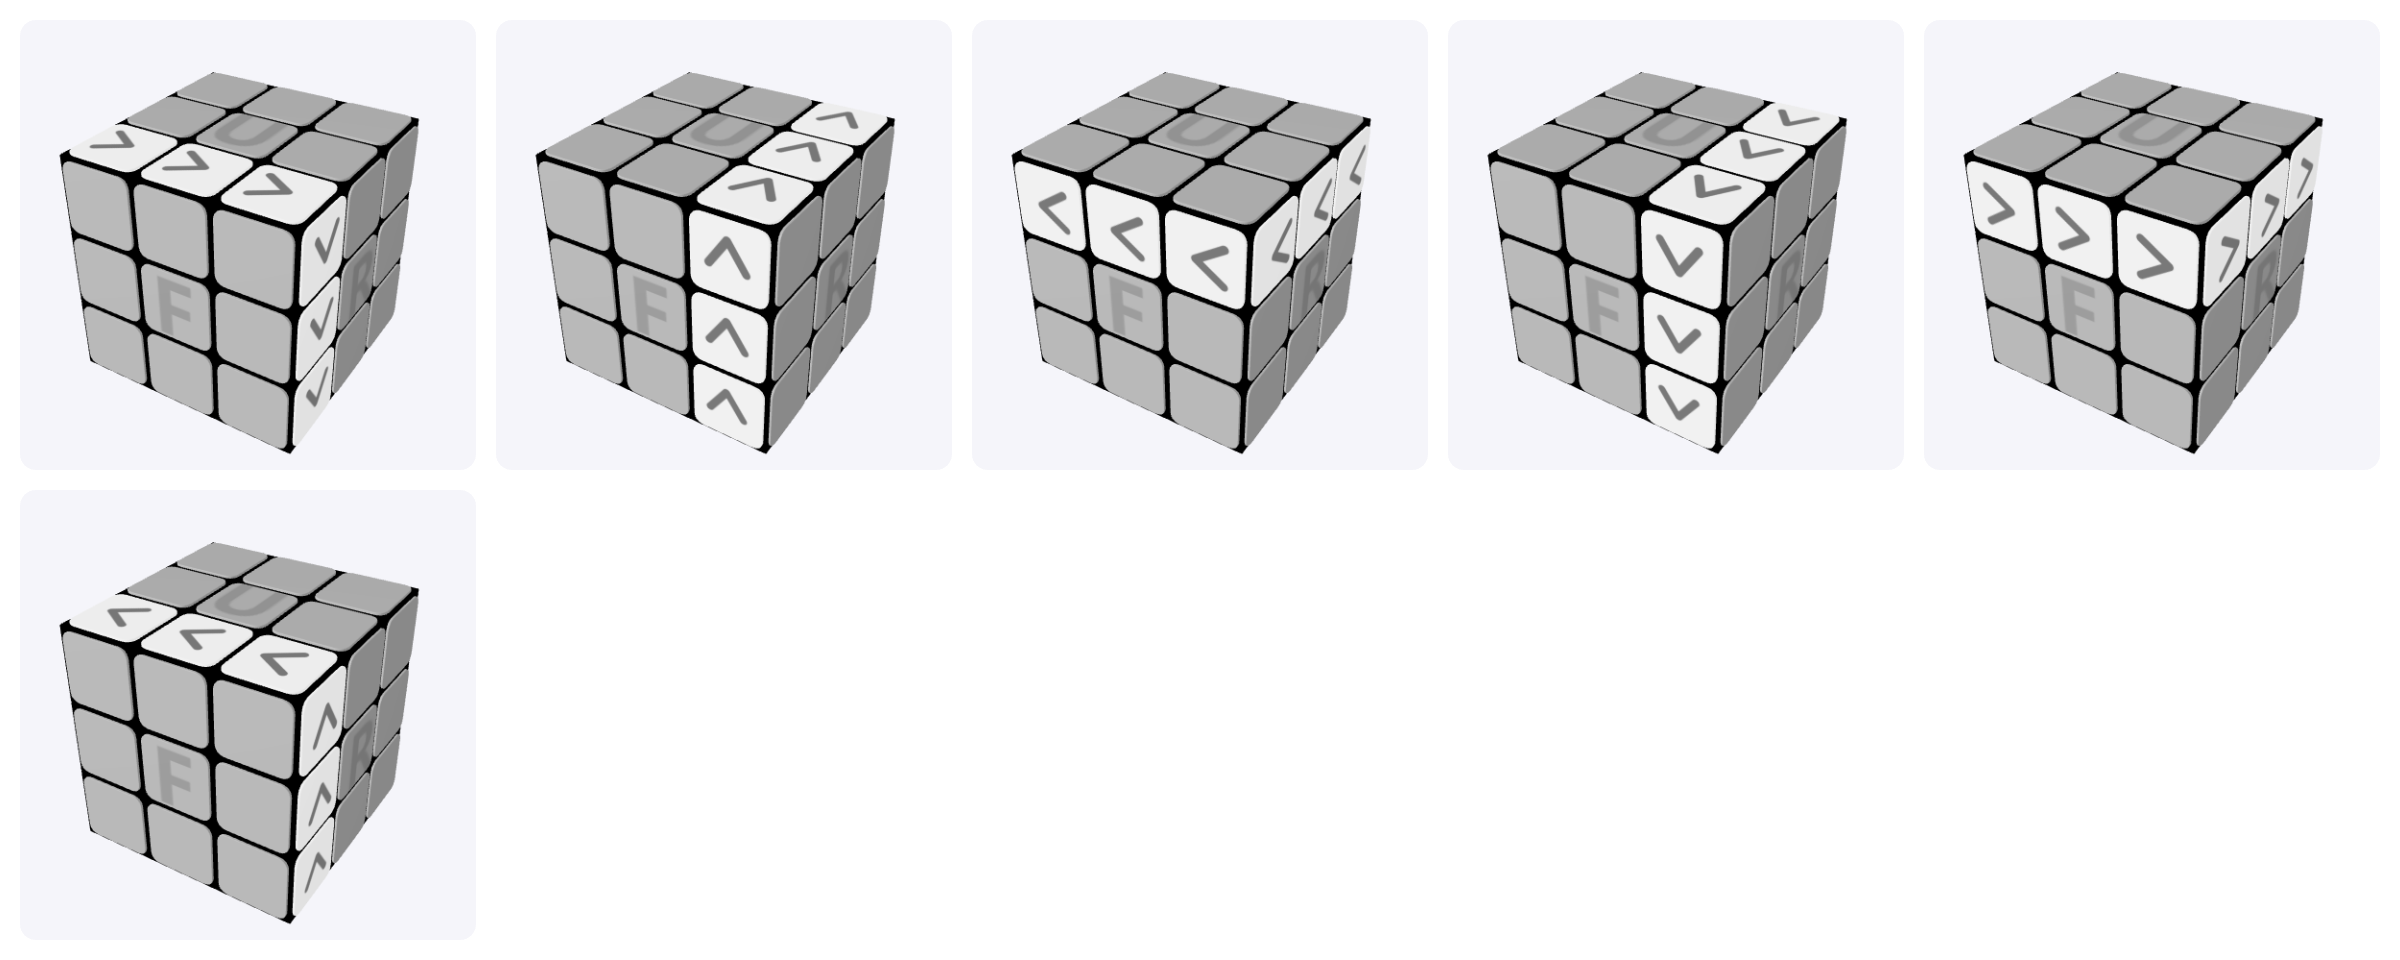
You may need to rotate the top face or repeat the algorithm more than
once.
Step 5: Complete the Top Face
Now make the entire top face one solid color. The side colors do not
need to be solved yet; focus only on getting all top stickers facing up.
Algorithm 1
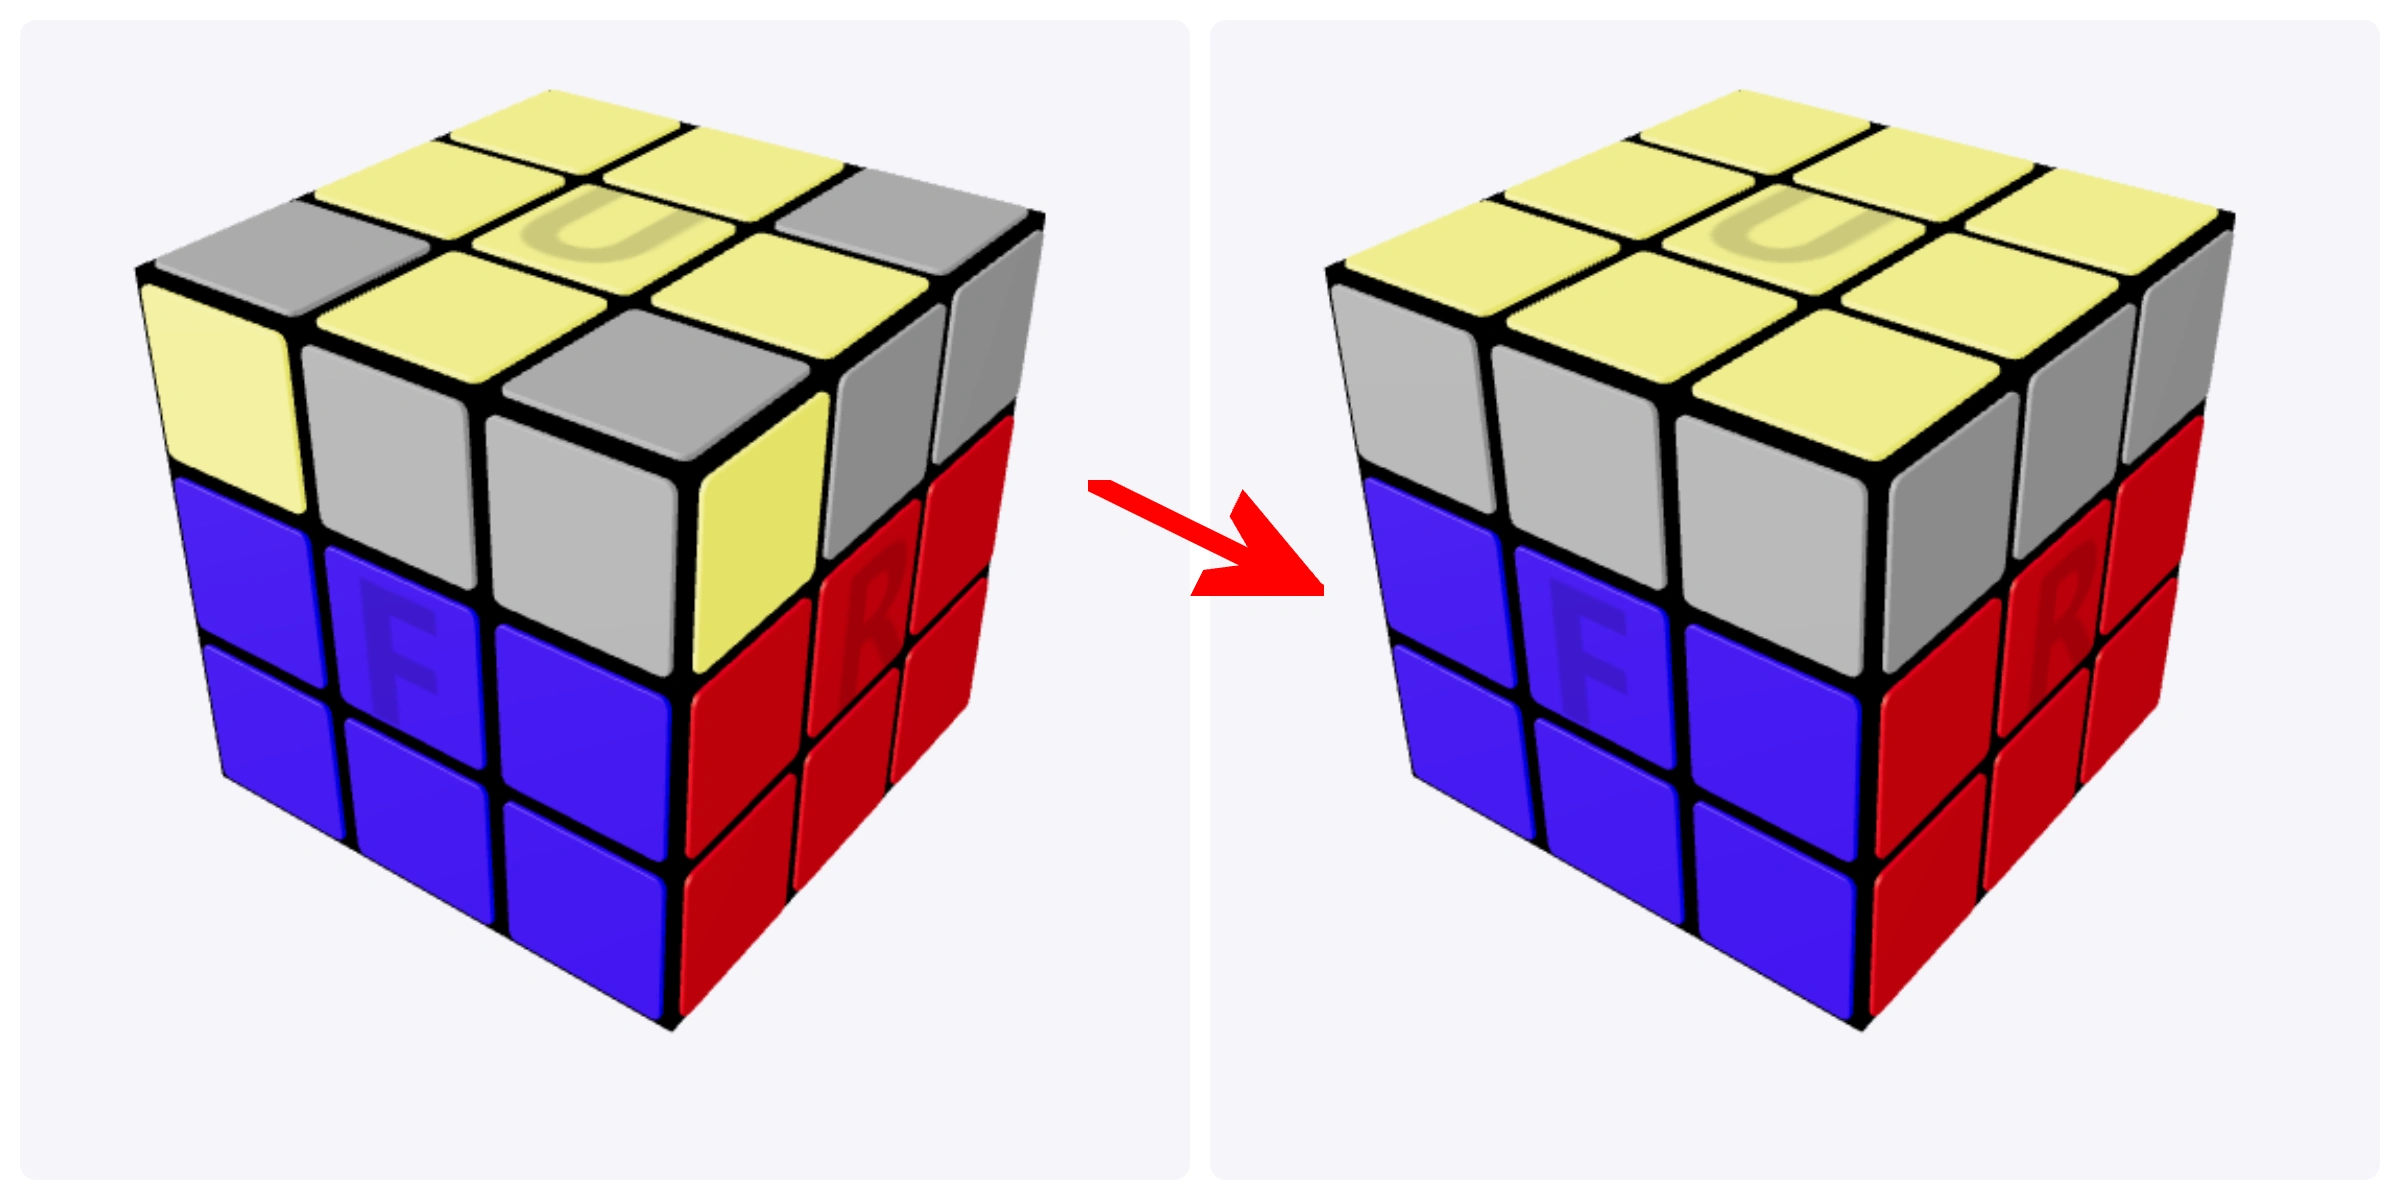
R' U' R U' R' U2 R
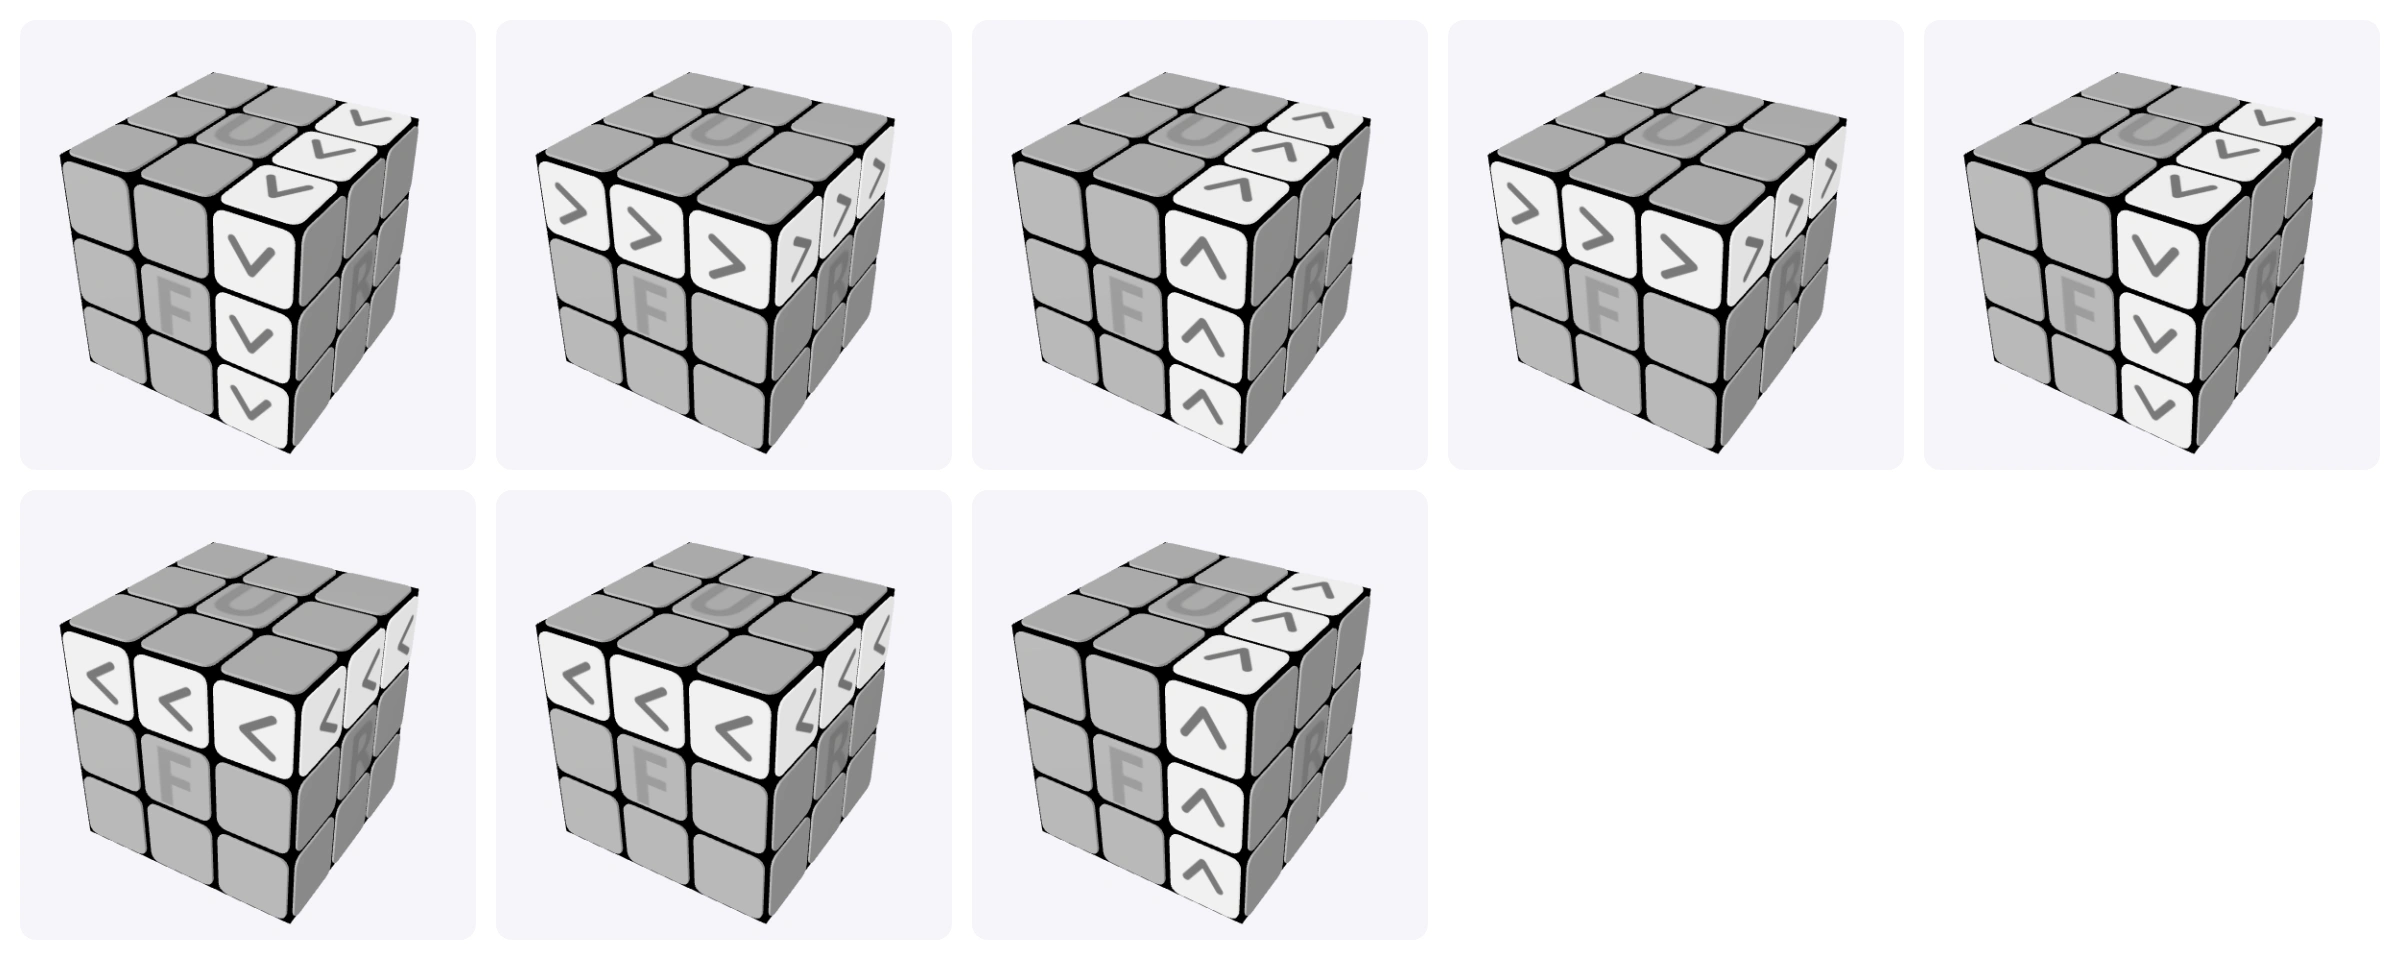
Algorithm 2
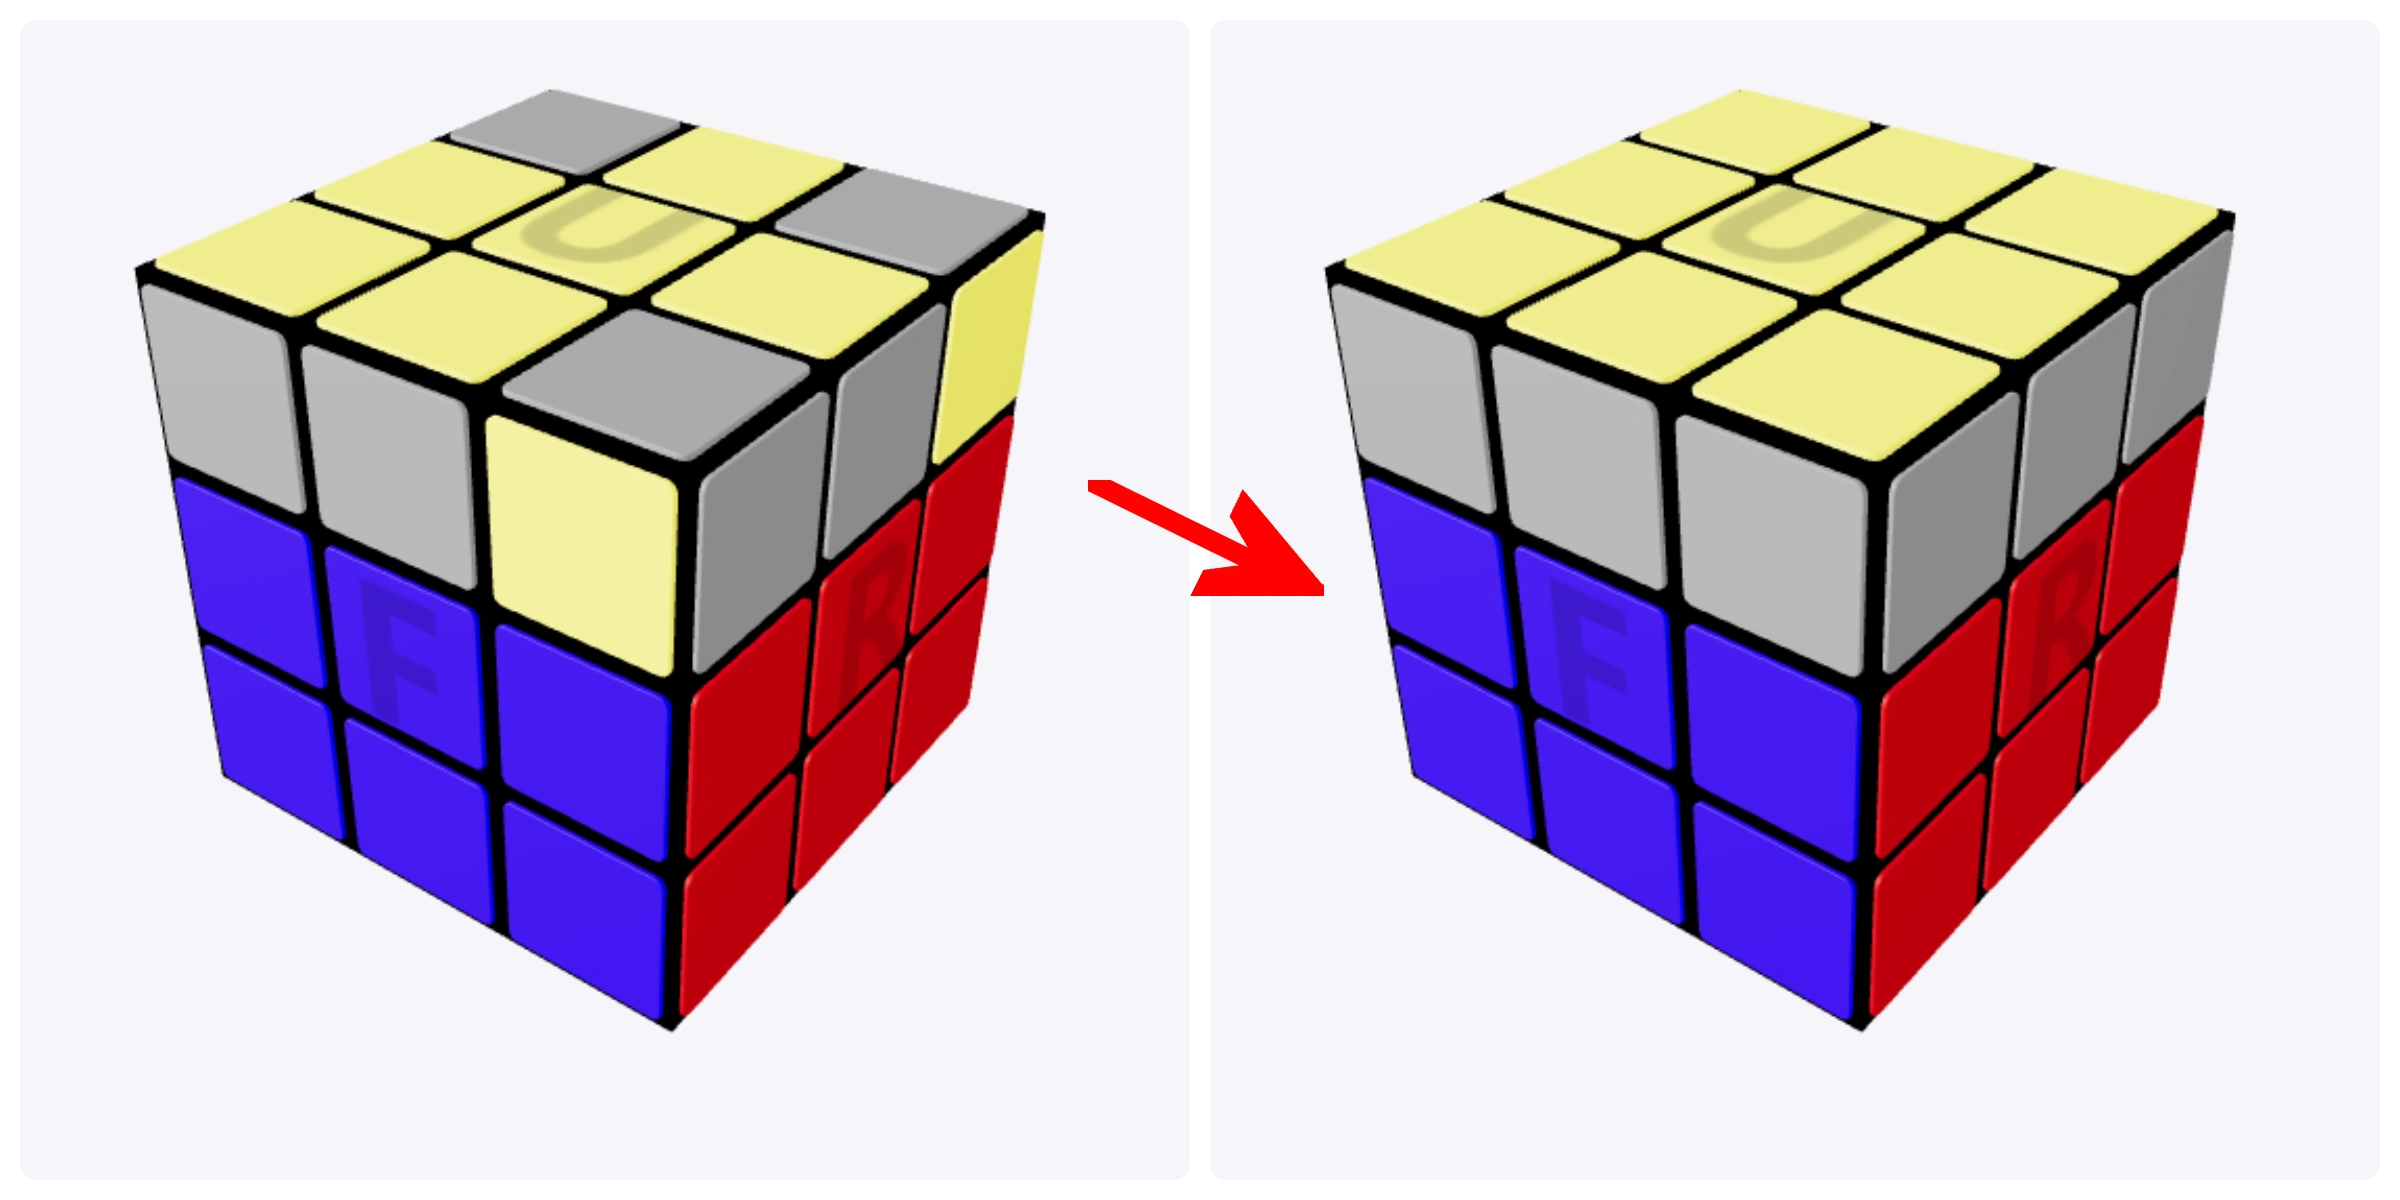
R U R' U R U2 R'
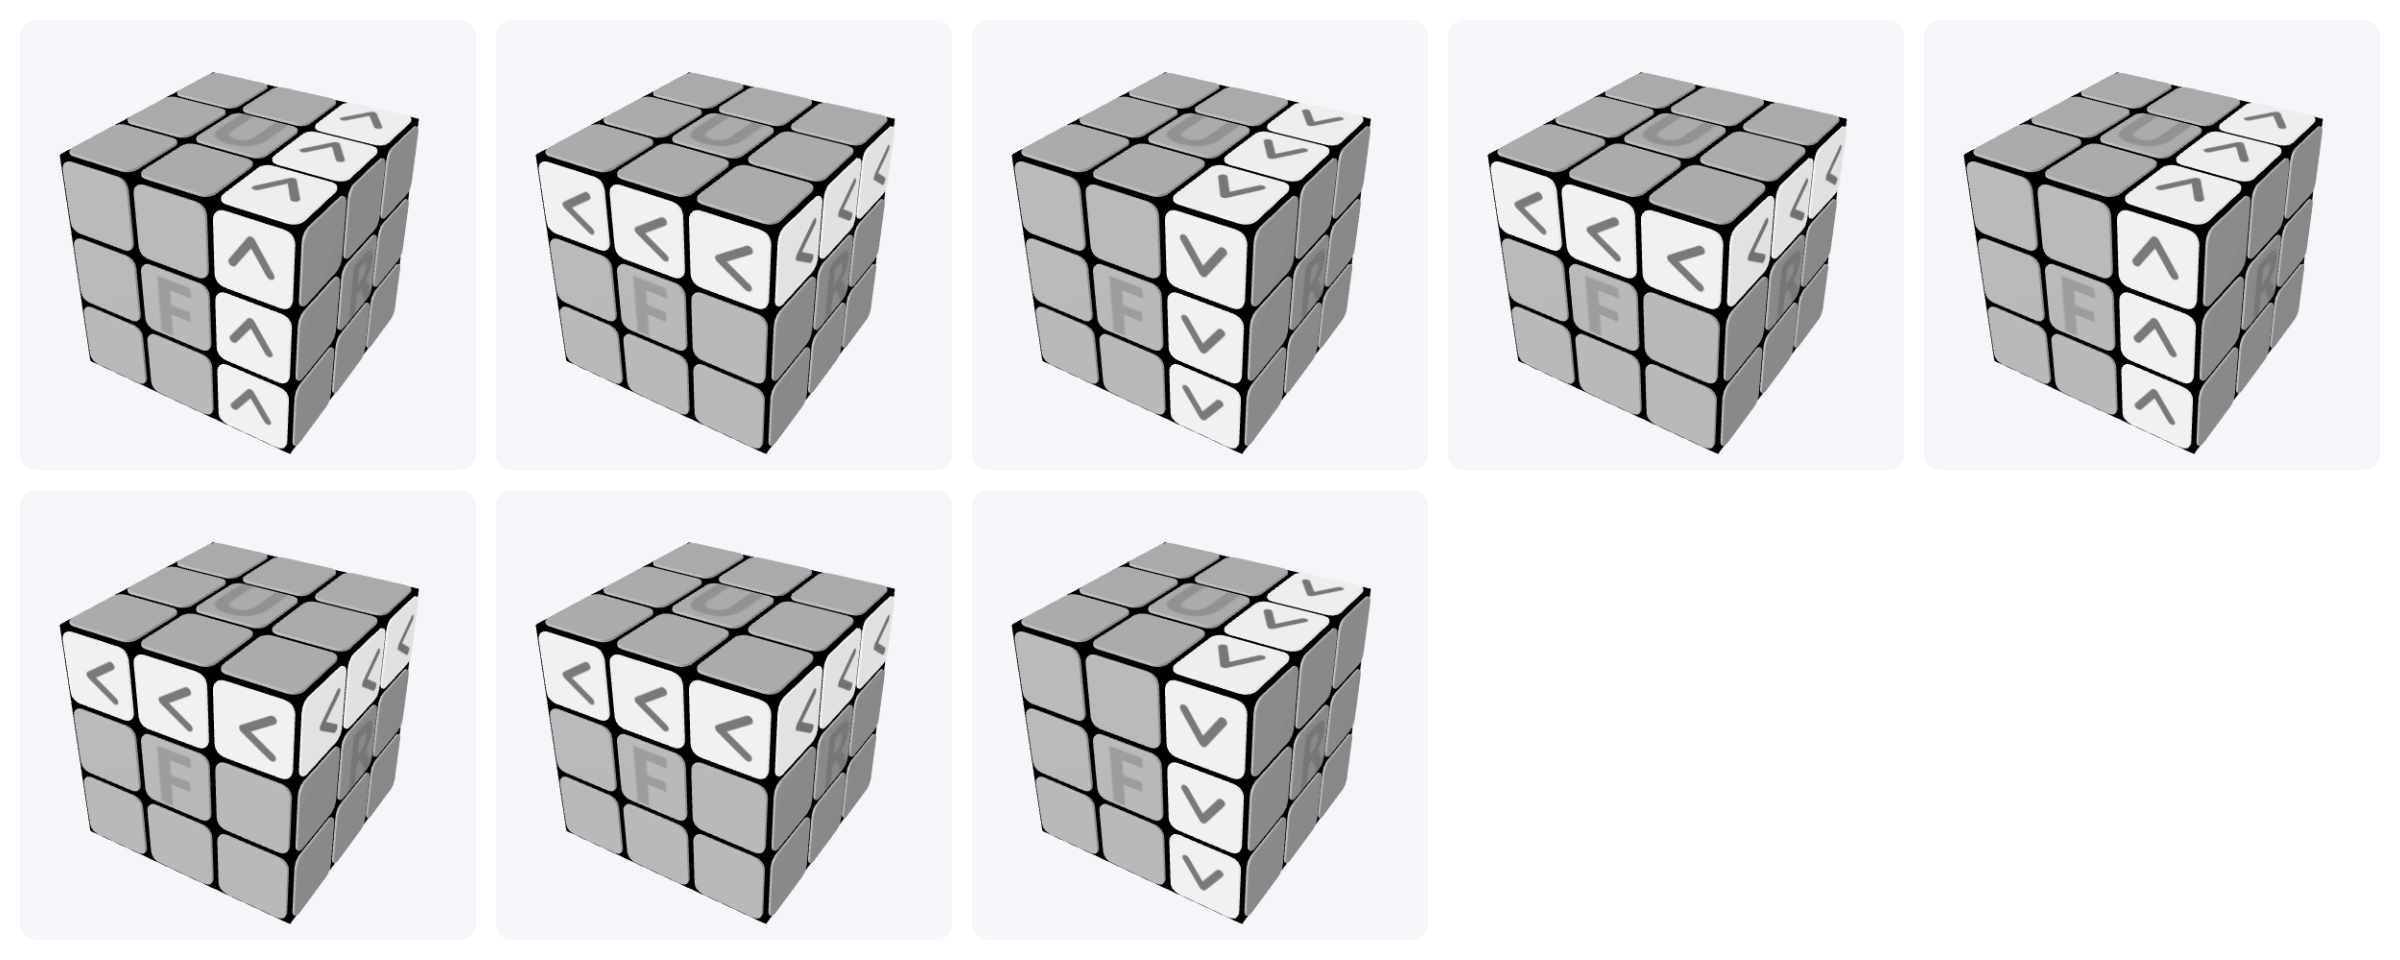
Use the algorithm that matches your case. If the top face is not solved
after one try, adjust the top layer with a U move and run
the algorithm again.
Step 6: Position the Top Corners
Once the top face color is complete, the last-layer corners may still
be in the wrong locations. In this step, you move the top corners to
their correct positions.
Corner cycle algorithm 1
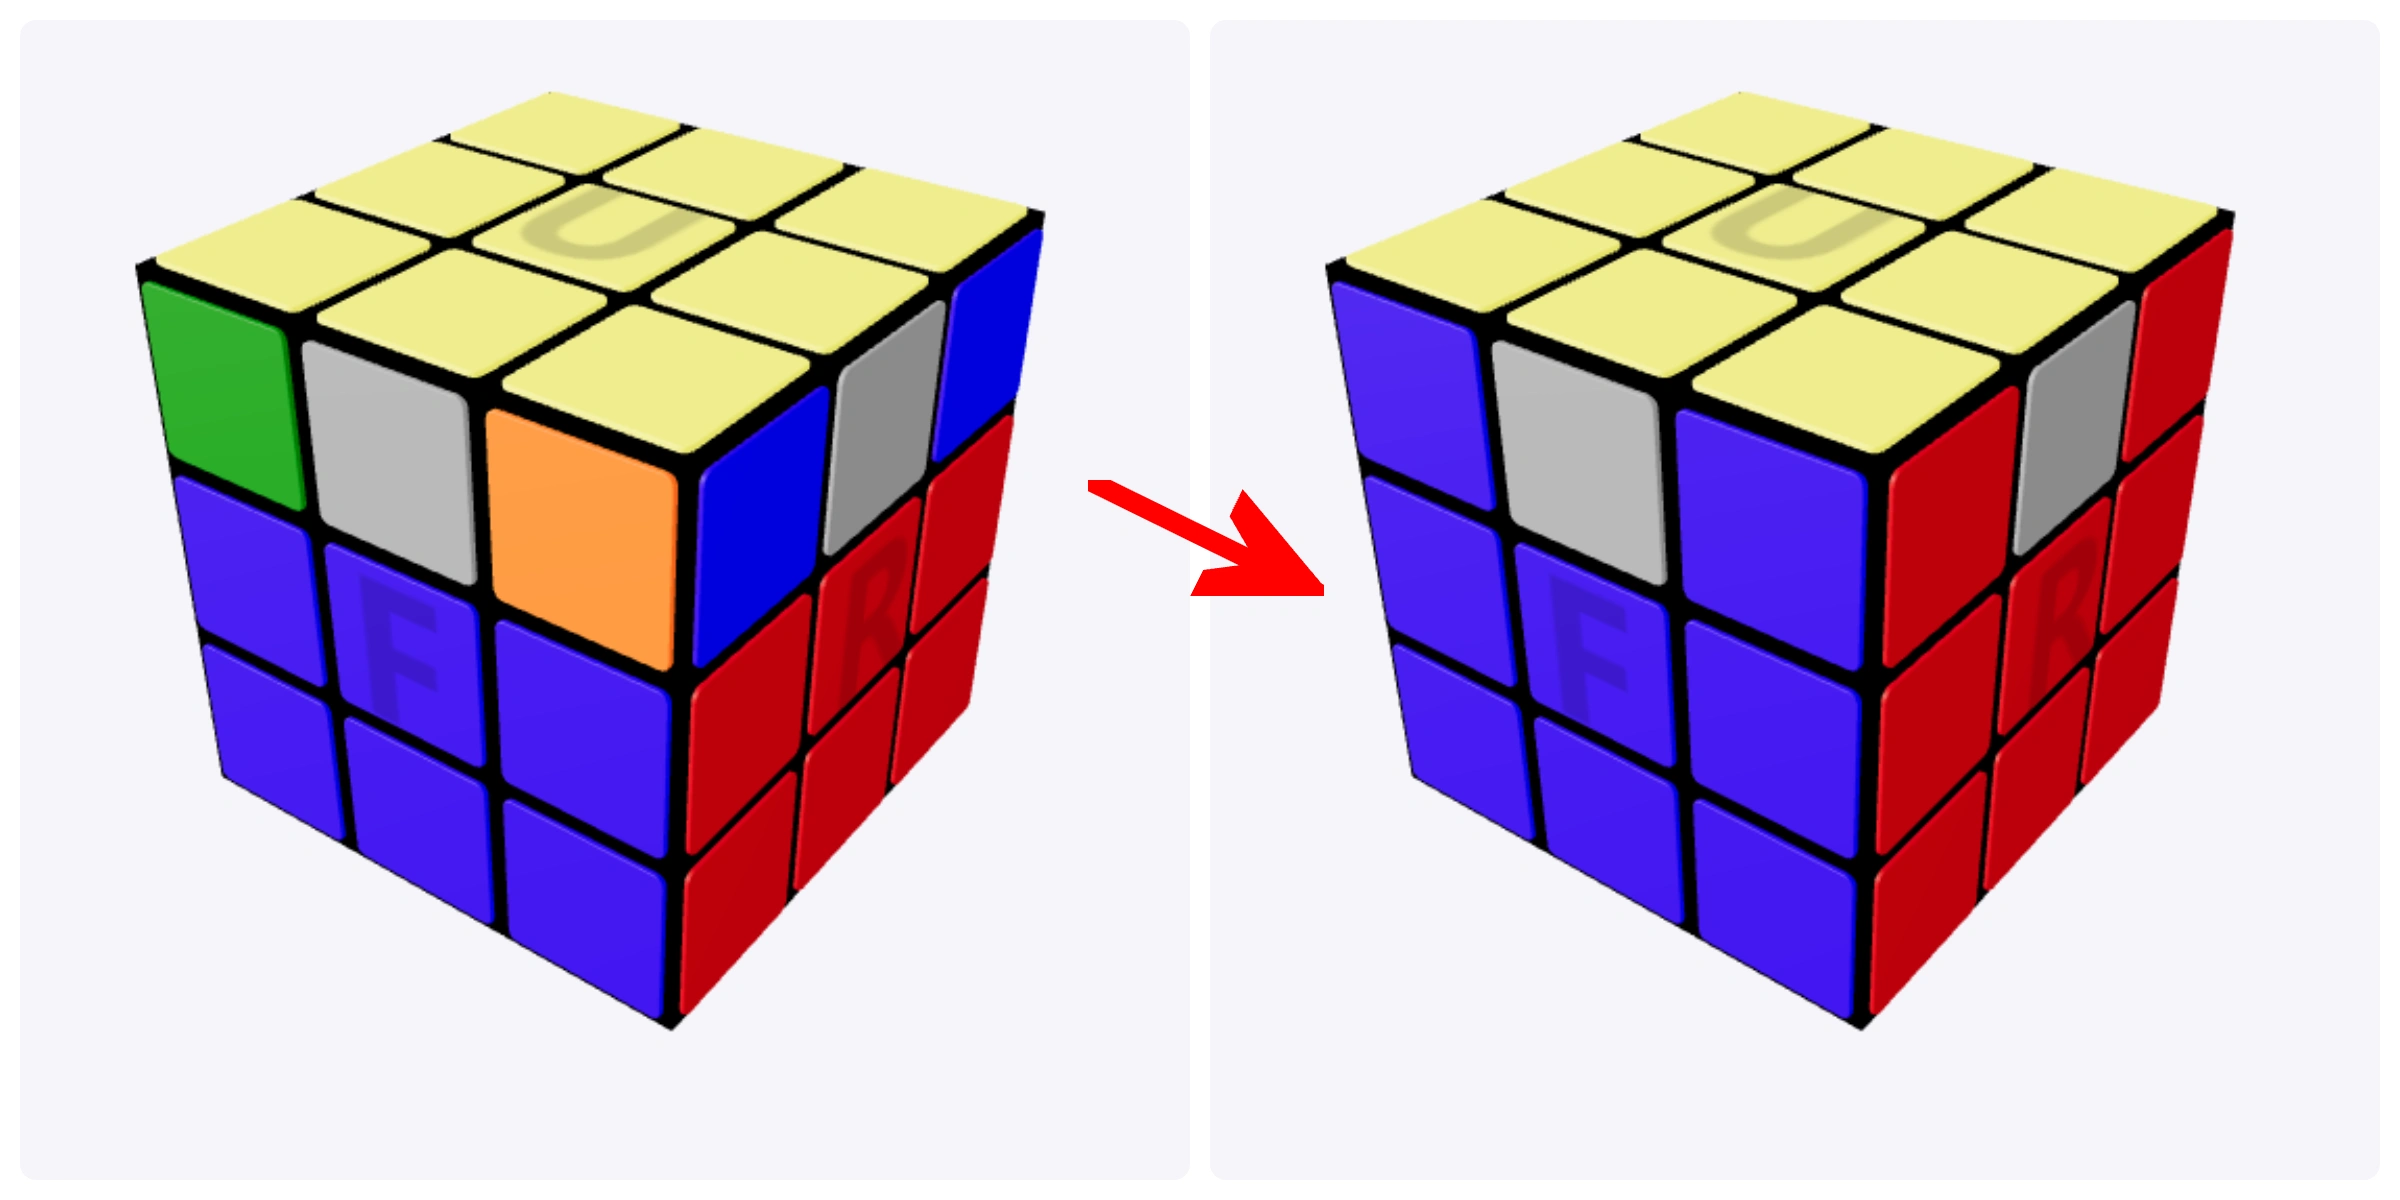
R2 F2 R' B' R F2 R' B R'
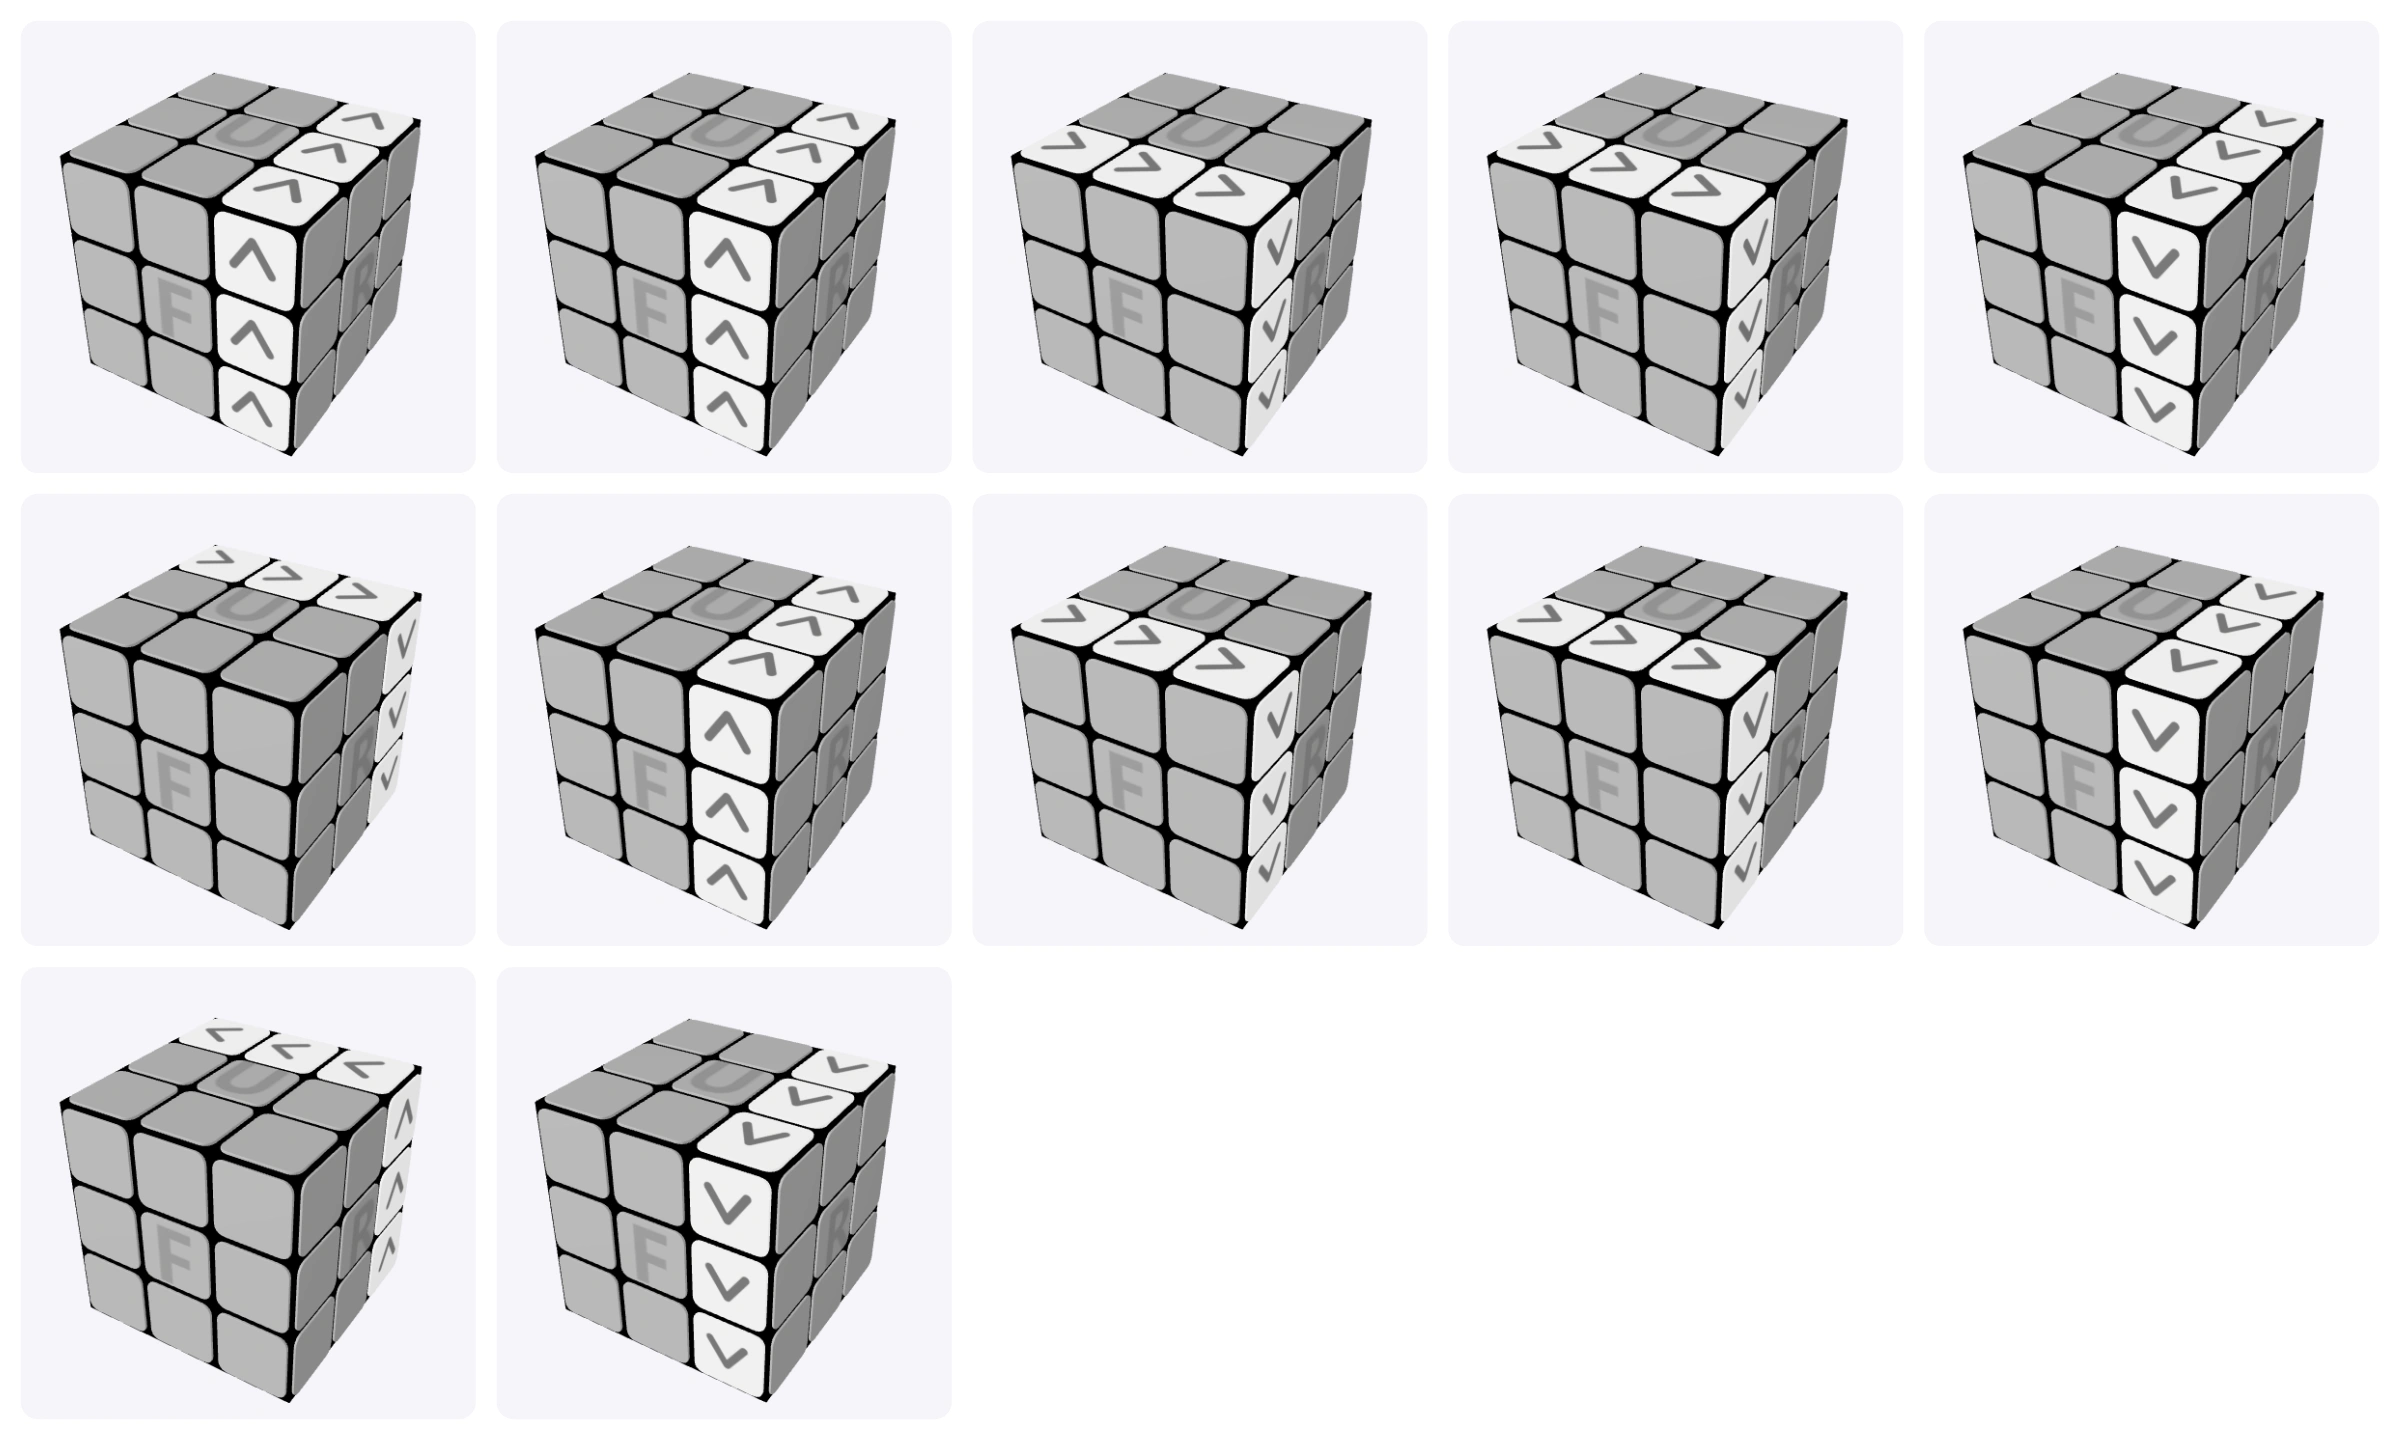
Corner cycle algorithm 2
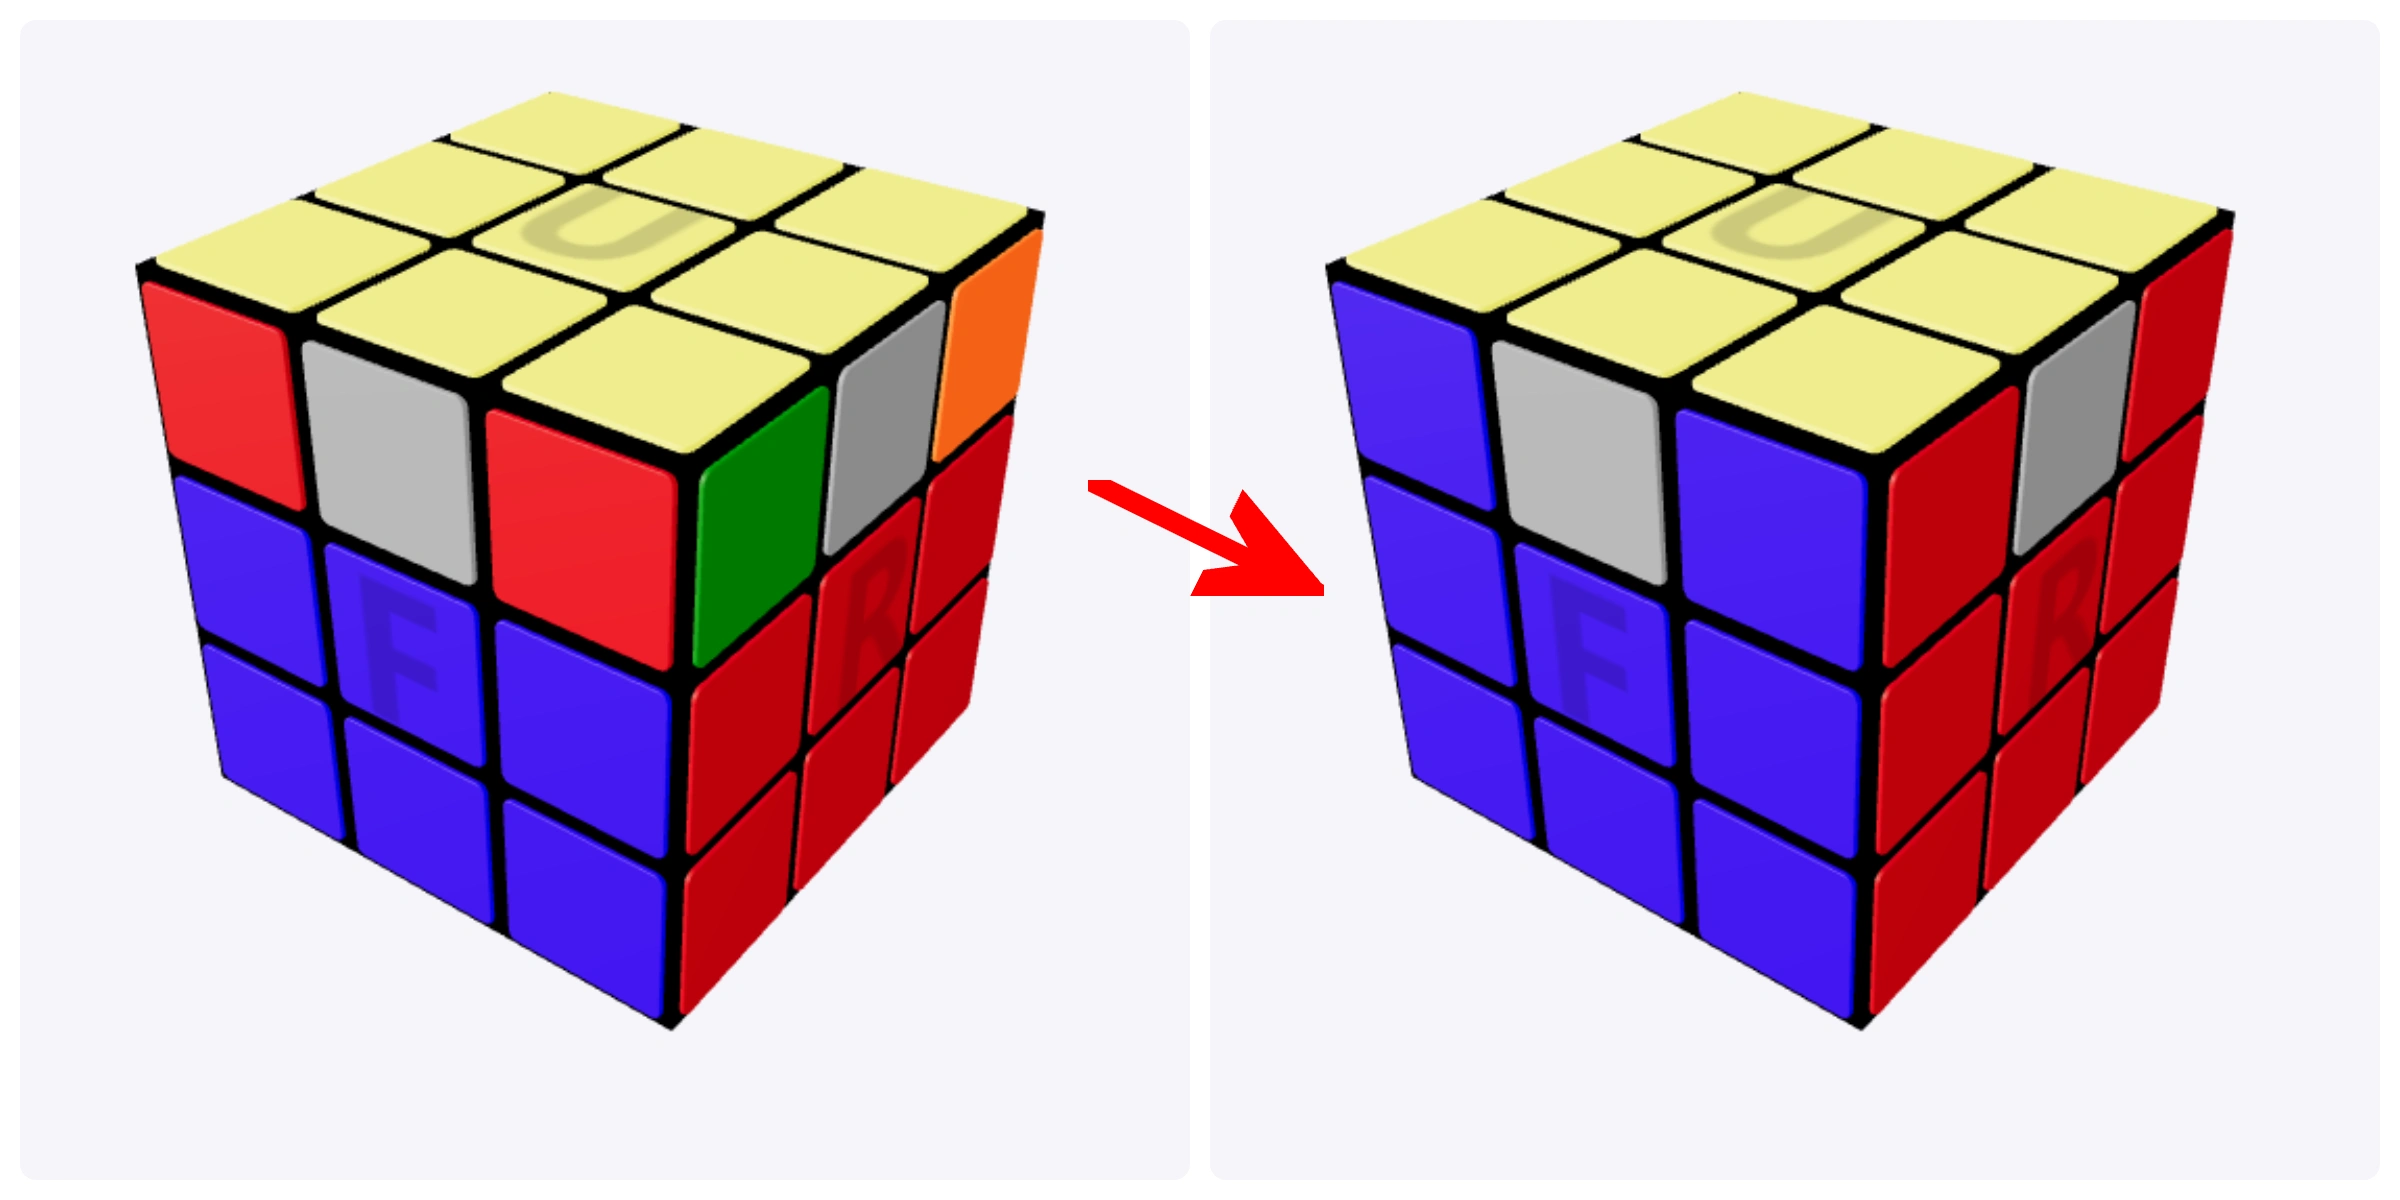
R B' R F2 R' B R F2 R2
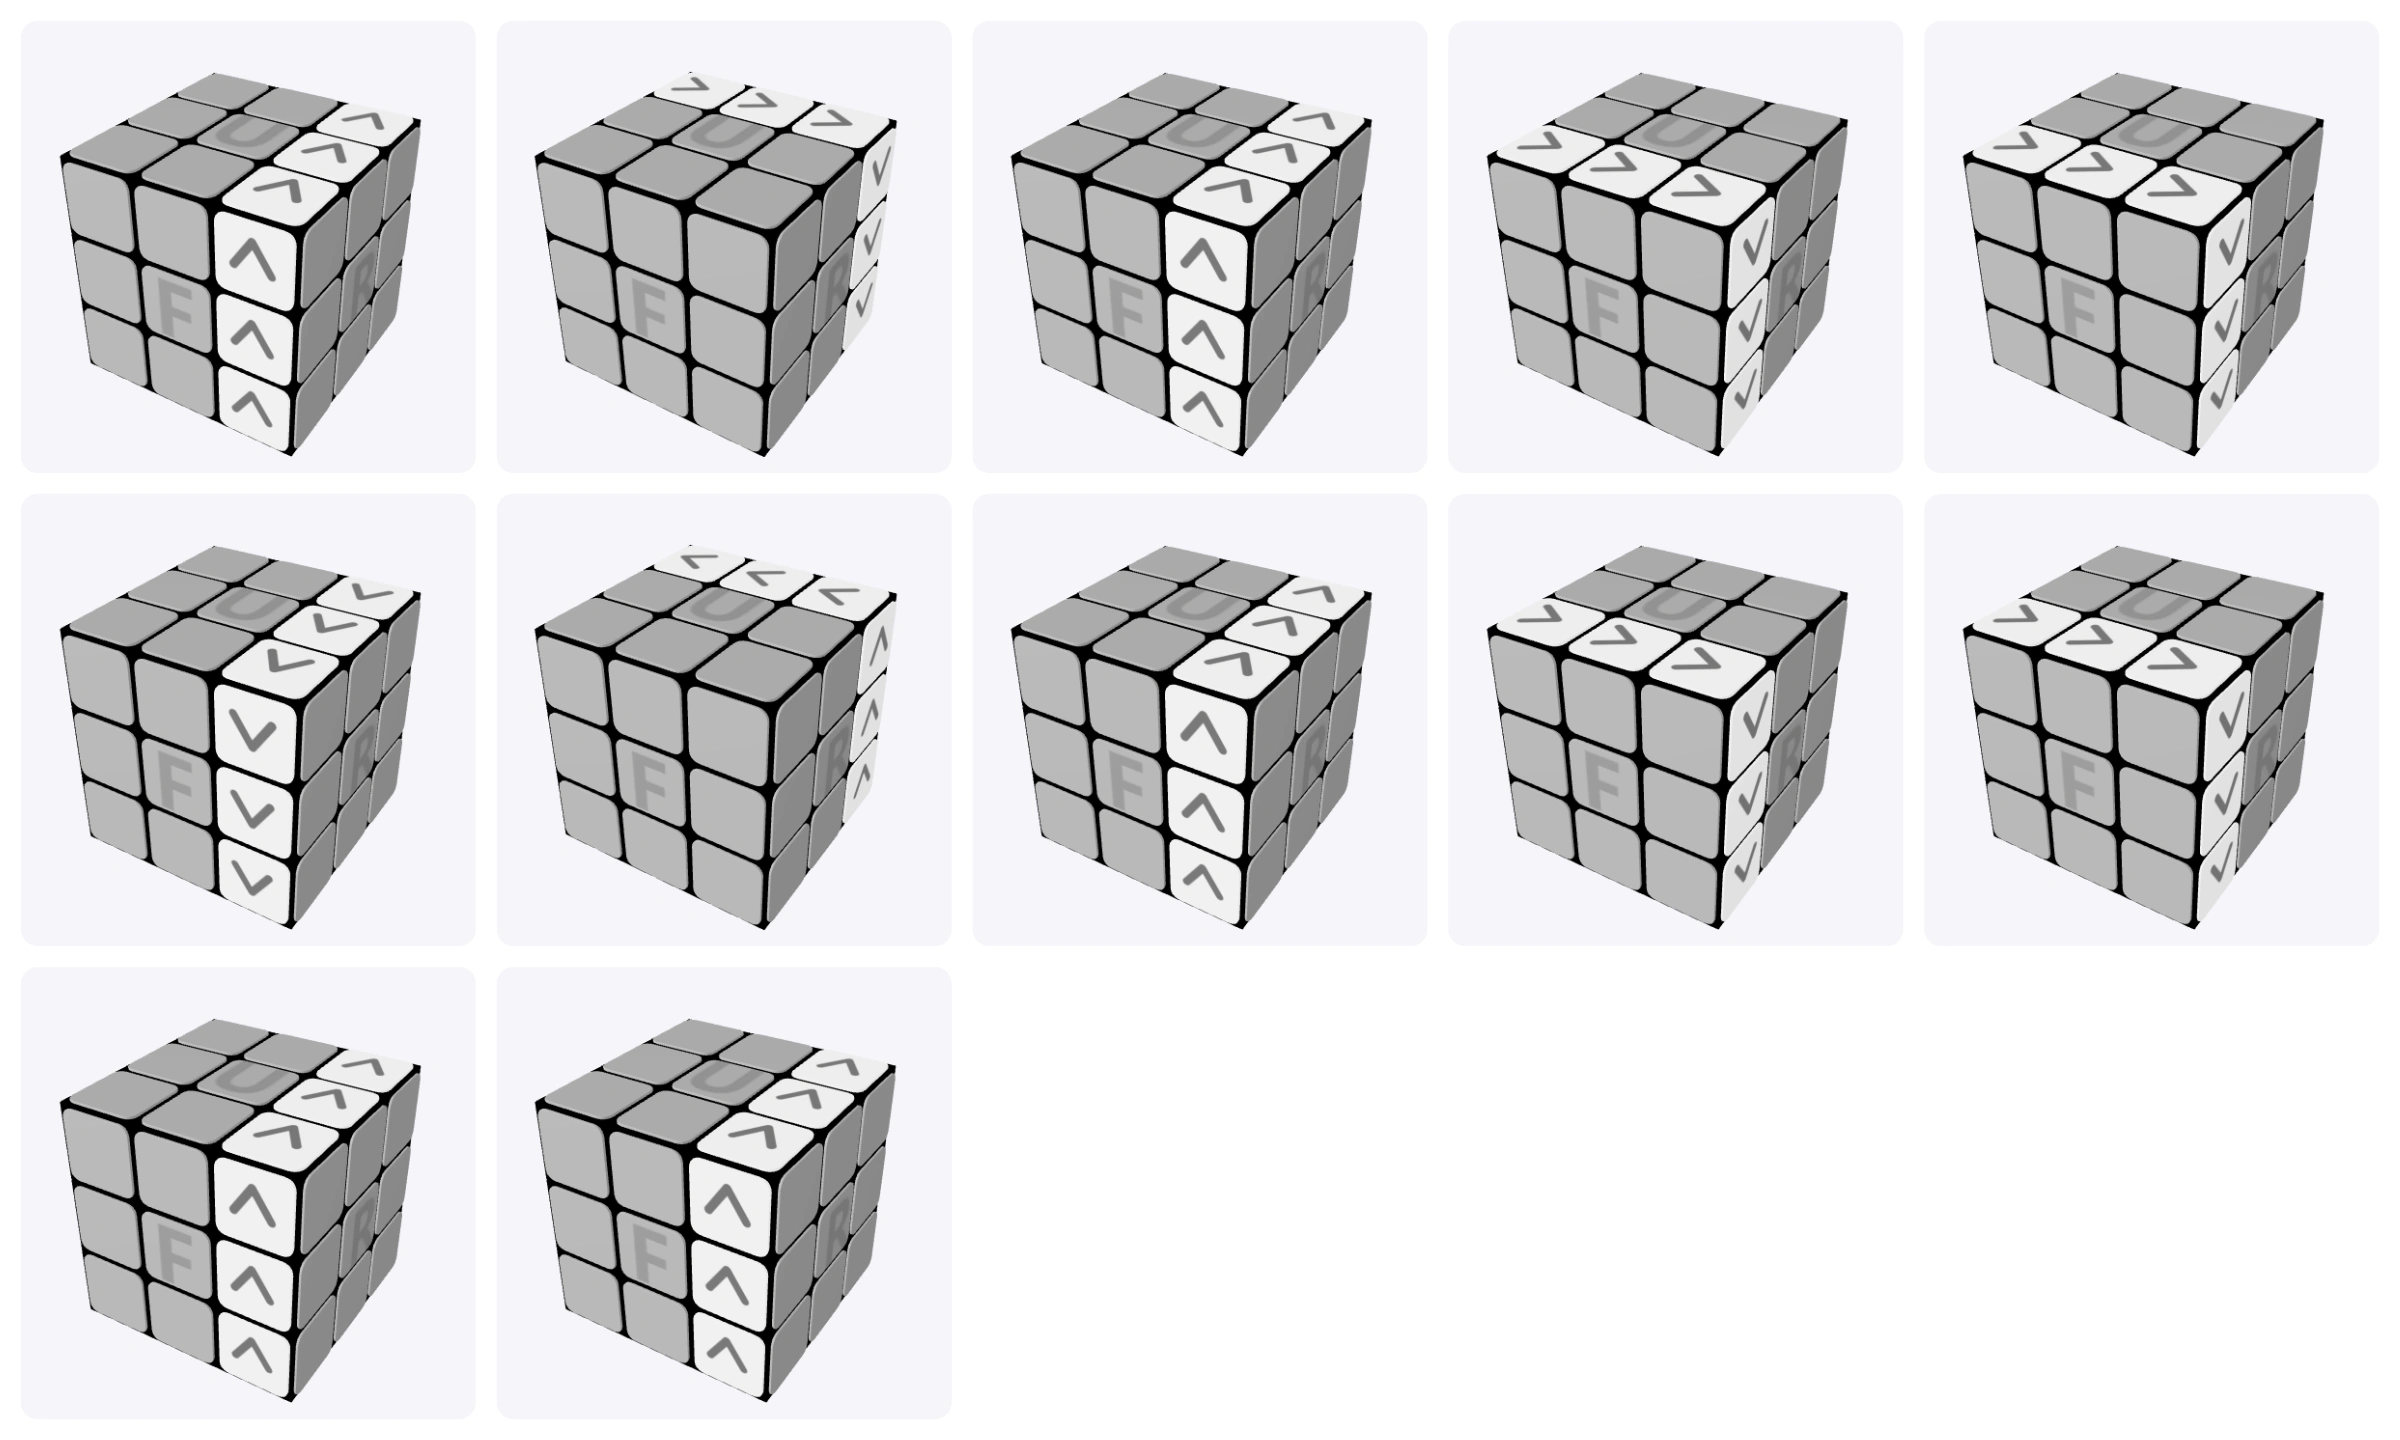
If no corners appear to be in the right place, run one of the algorithms
once. Then check again and continue from there.
Step 7: Position the Top Edges
This is the final step. The top face should already be solved, but the
last-layer edge pieces may need to be cycled around the cube.
Edge cycle algorithm 1
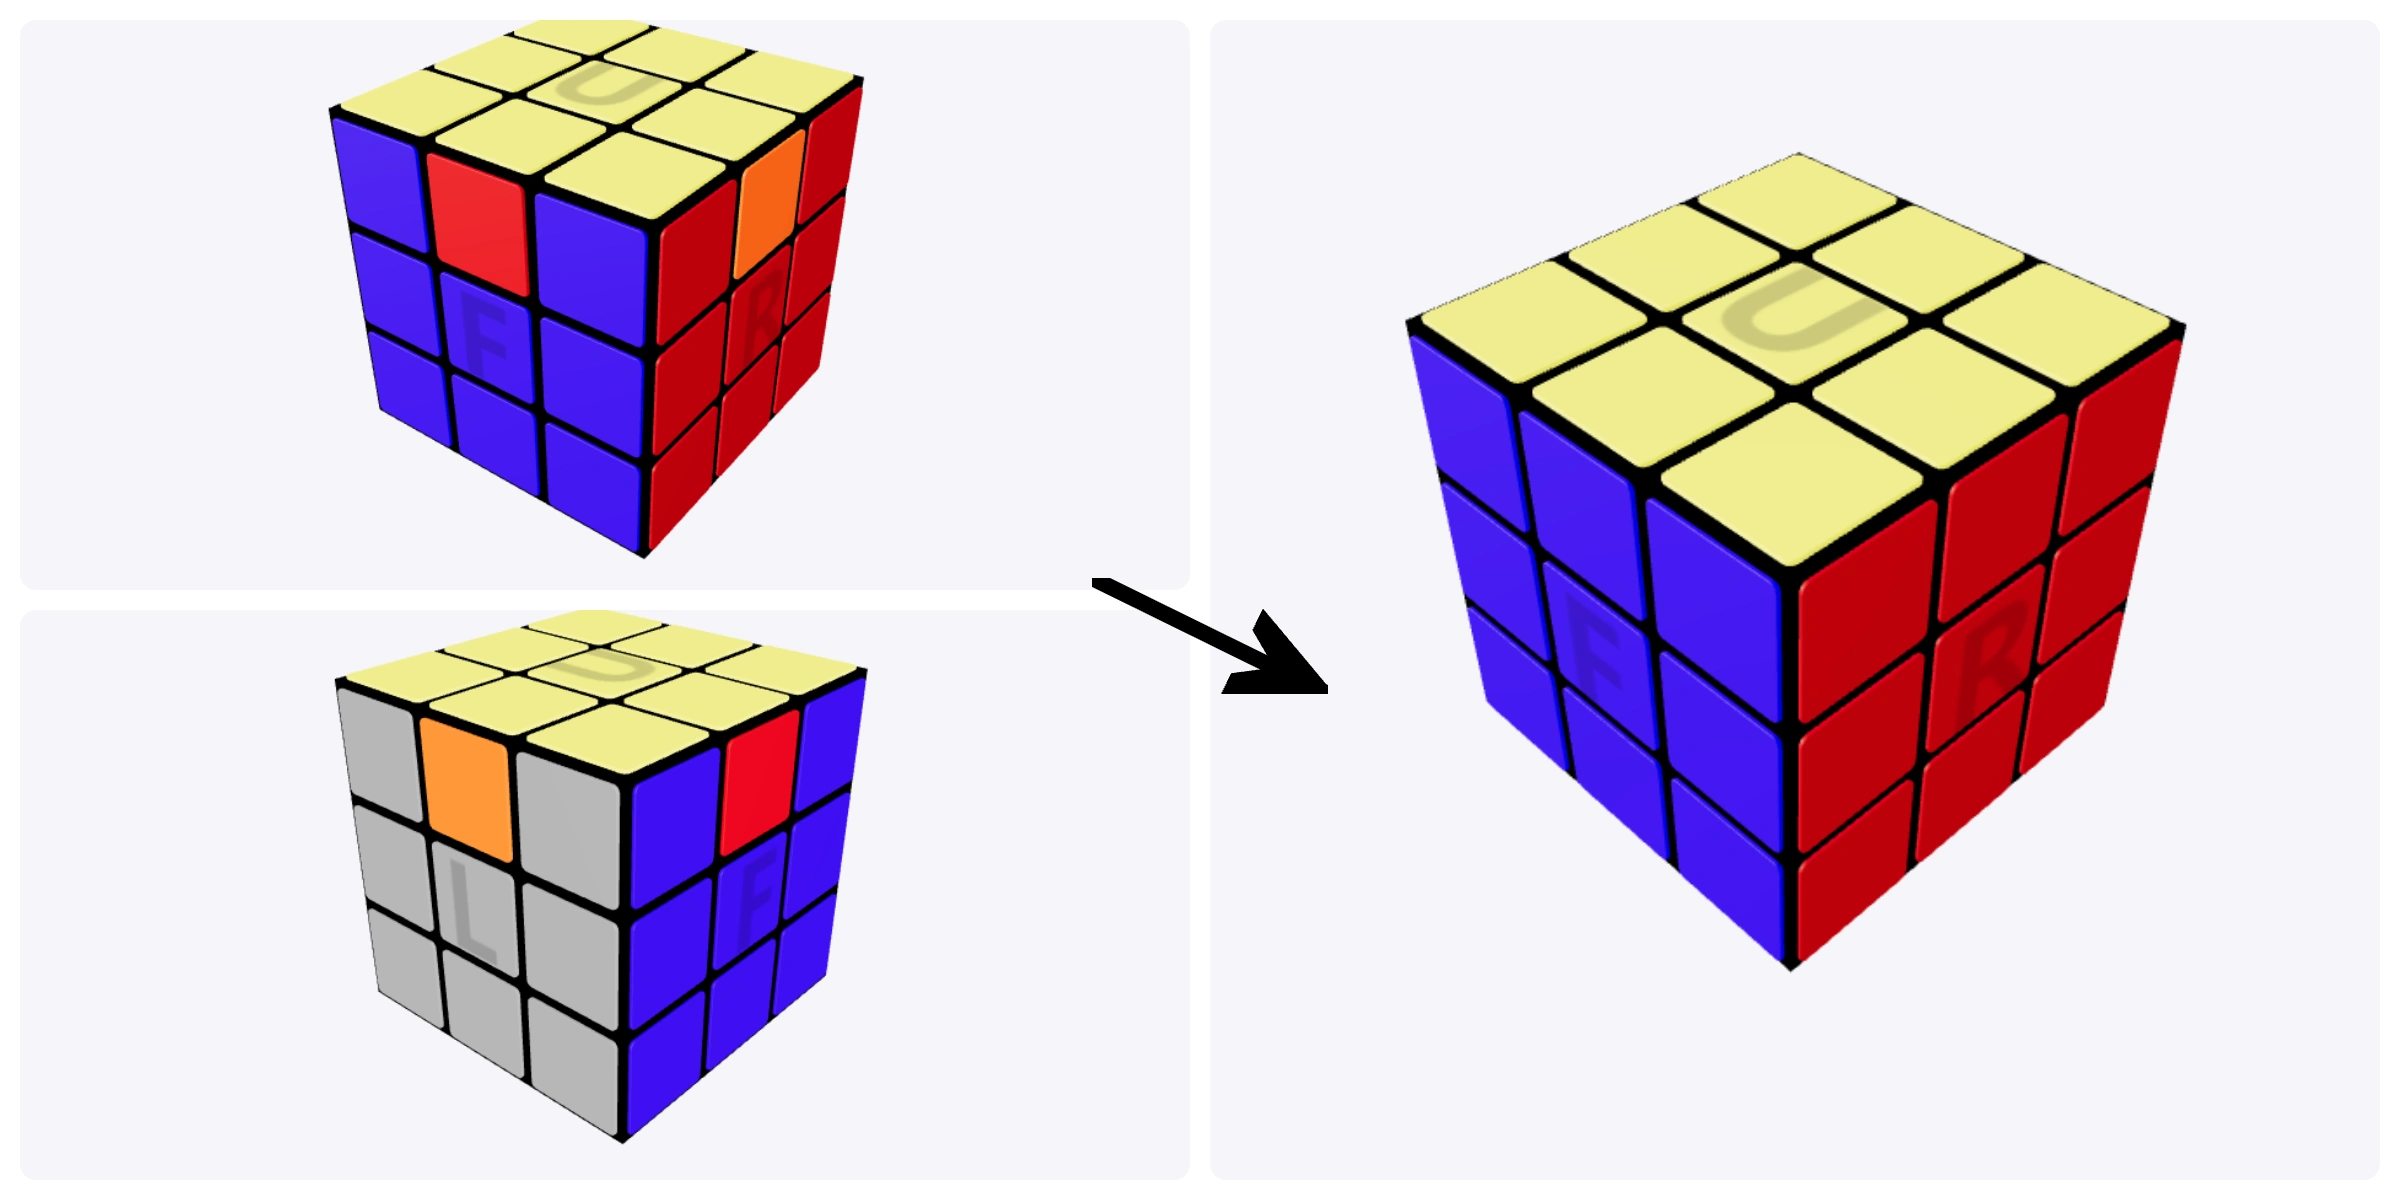
R U' R U R U R U' R' U' R2
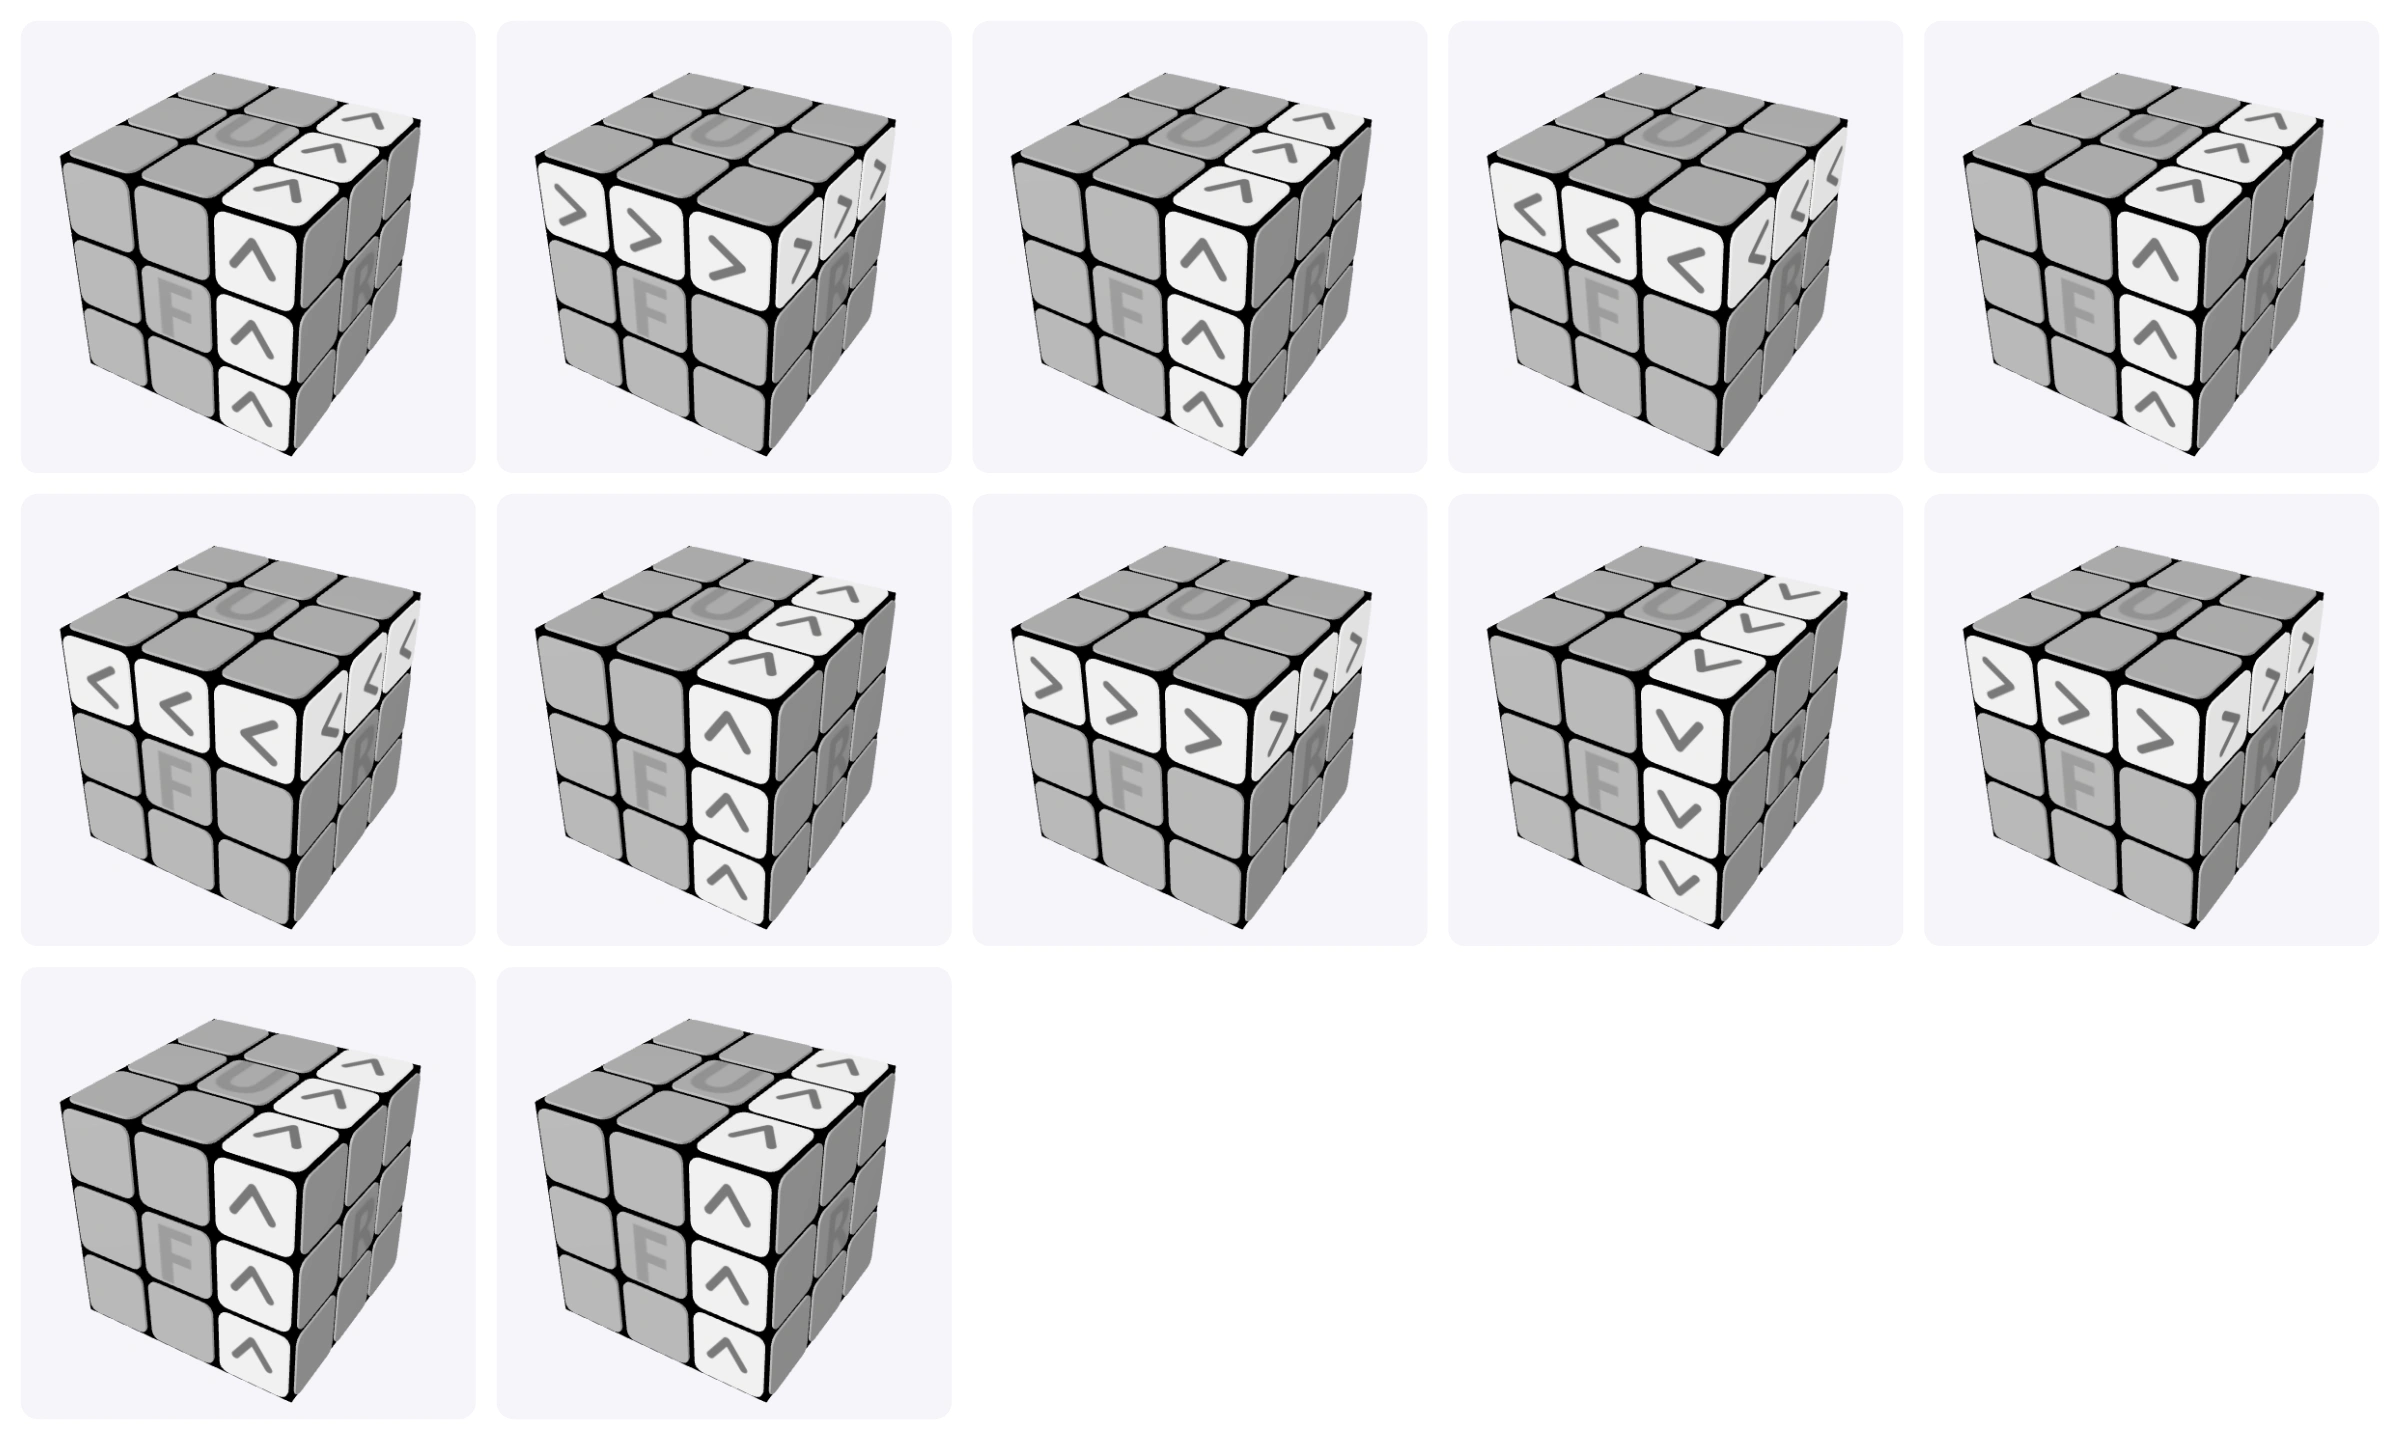
Edge cycle algorithm 2
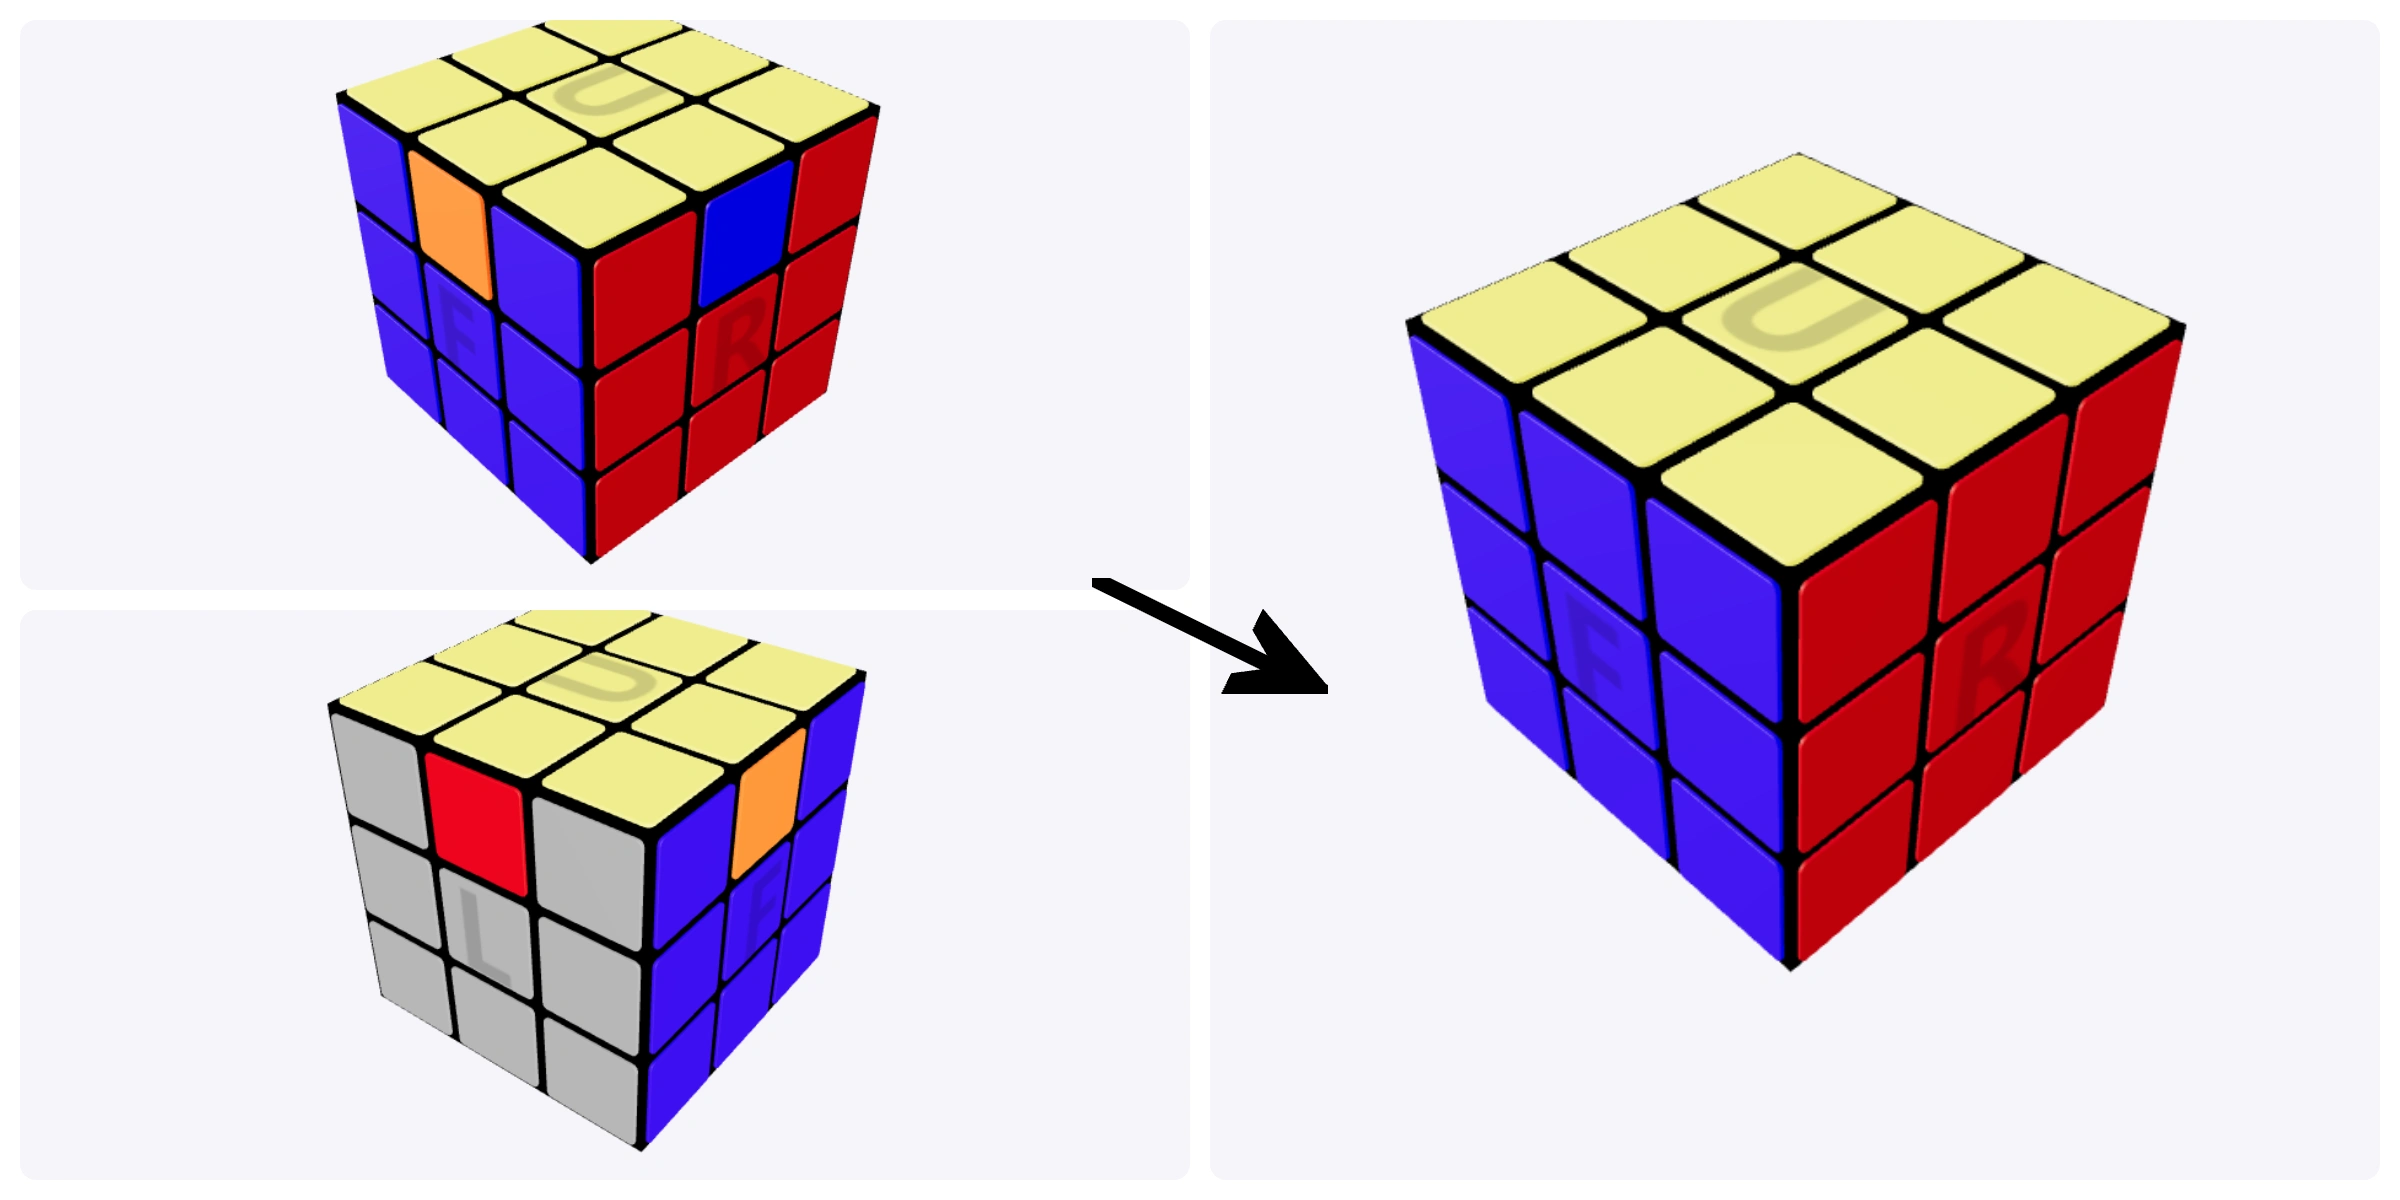
L' U L' U' L' U' L' U L U L2
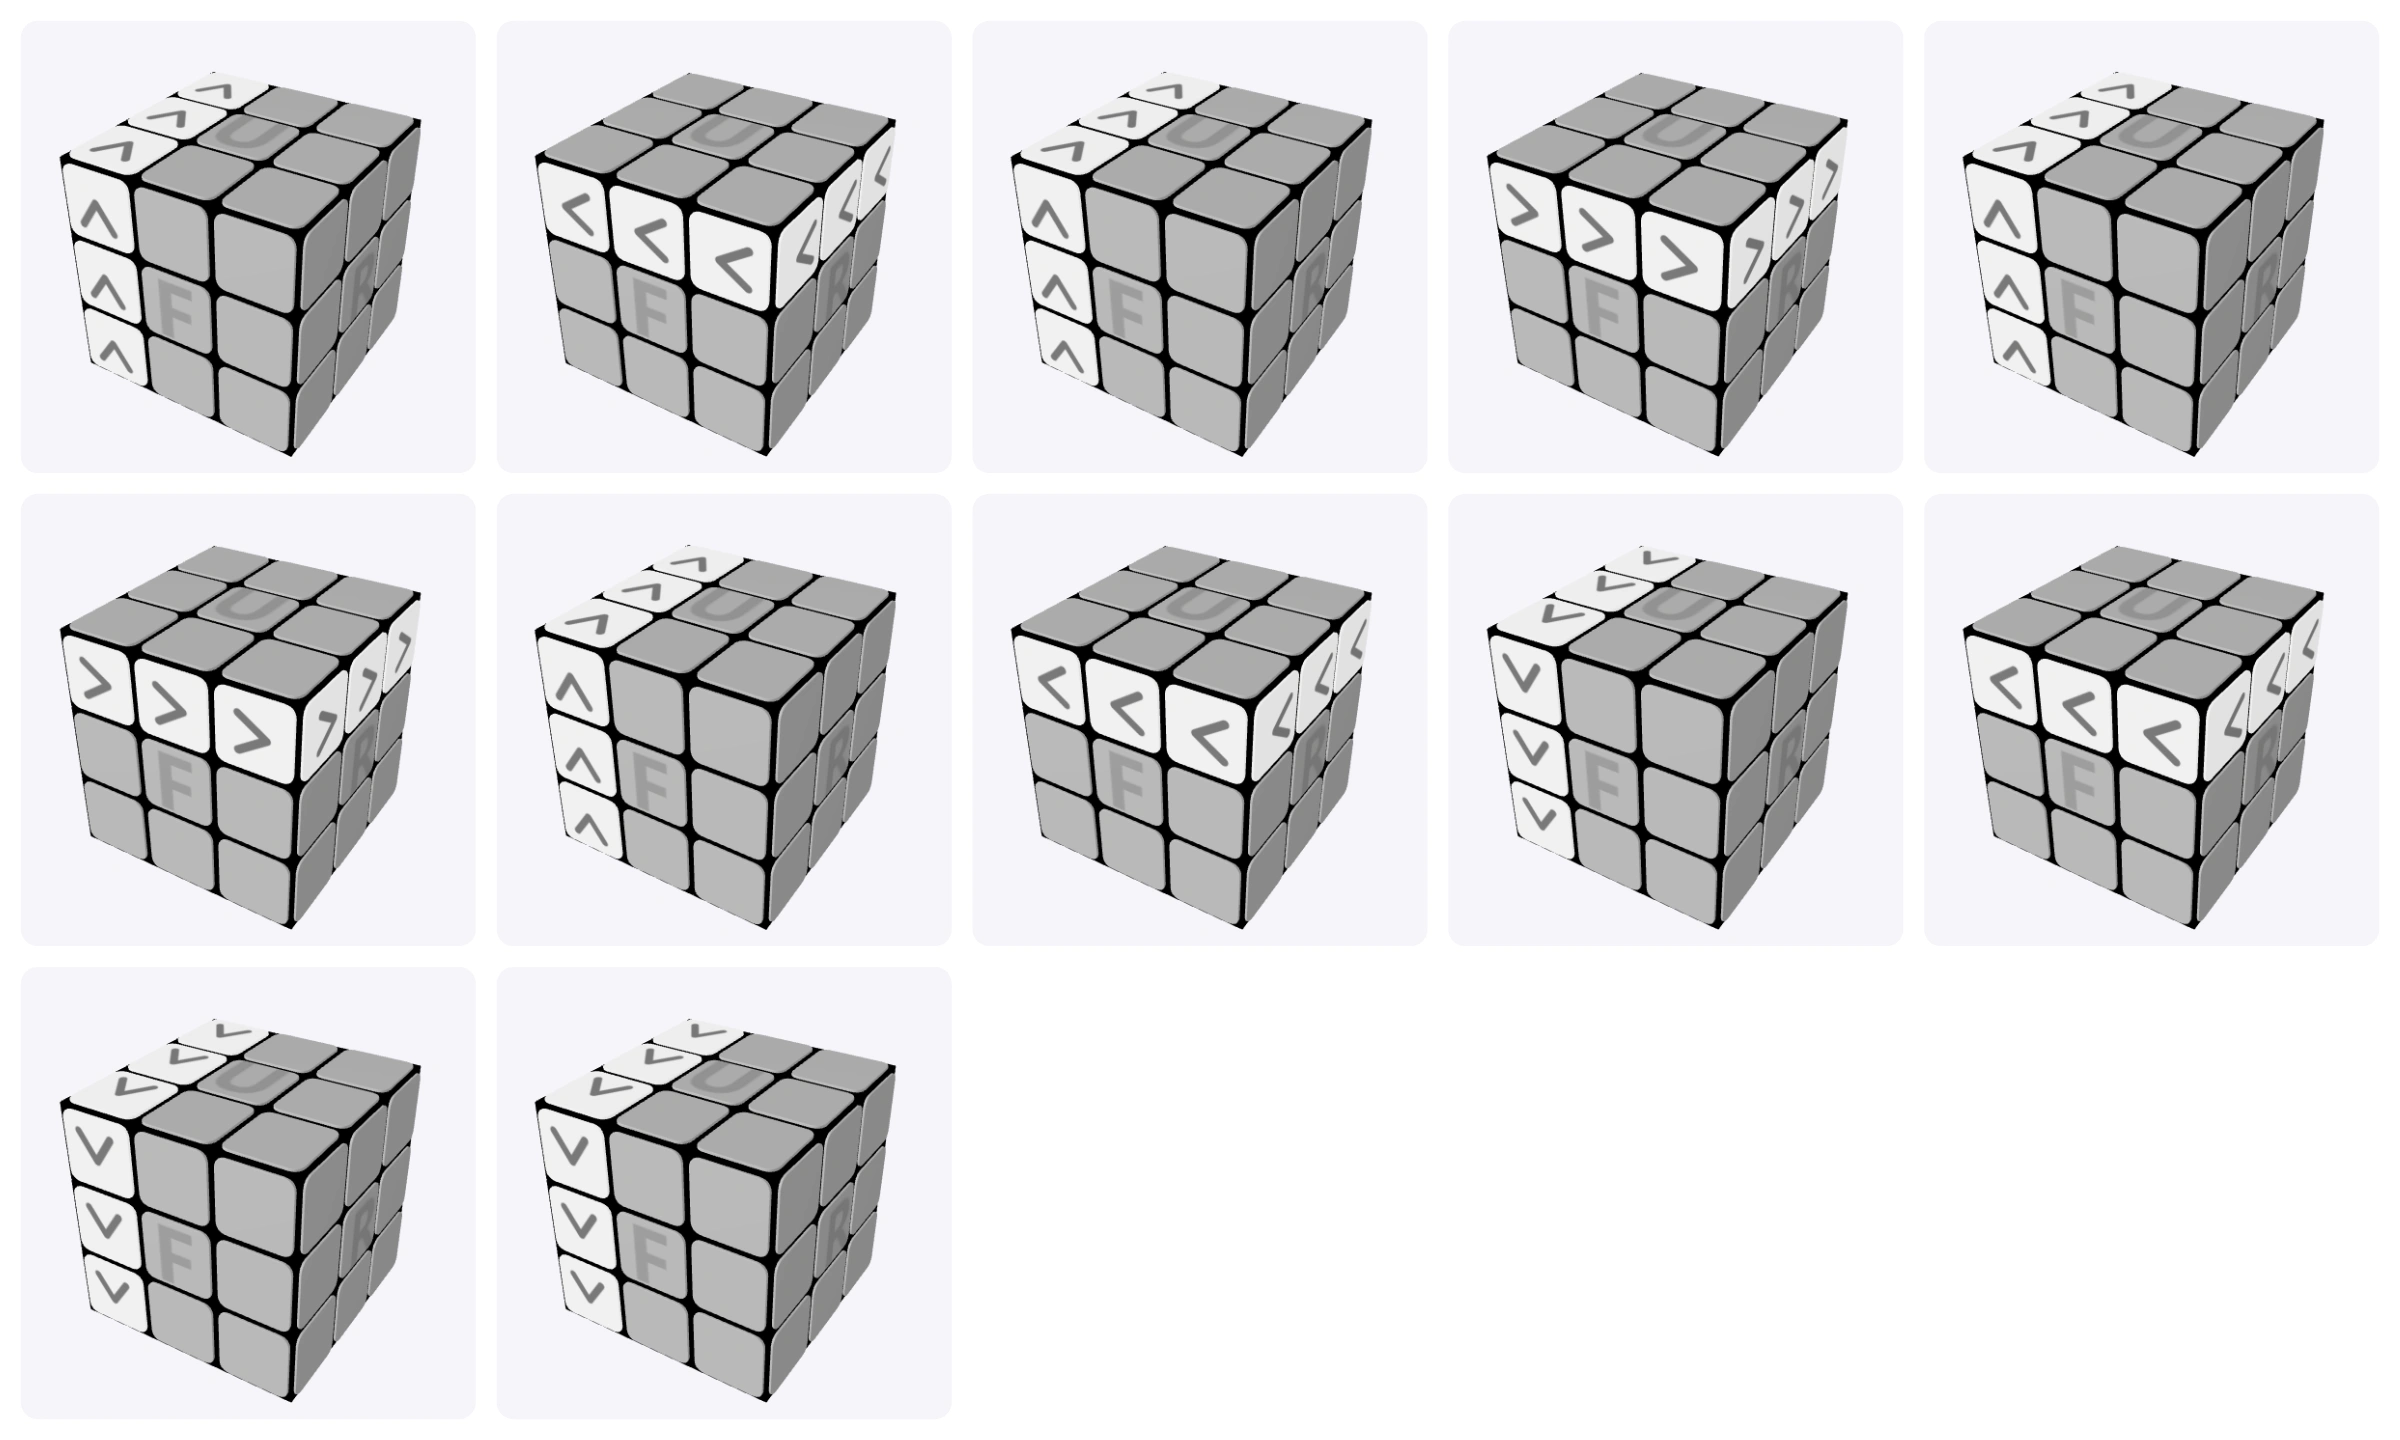
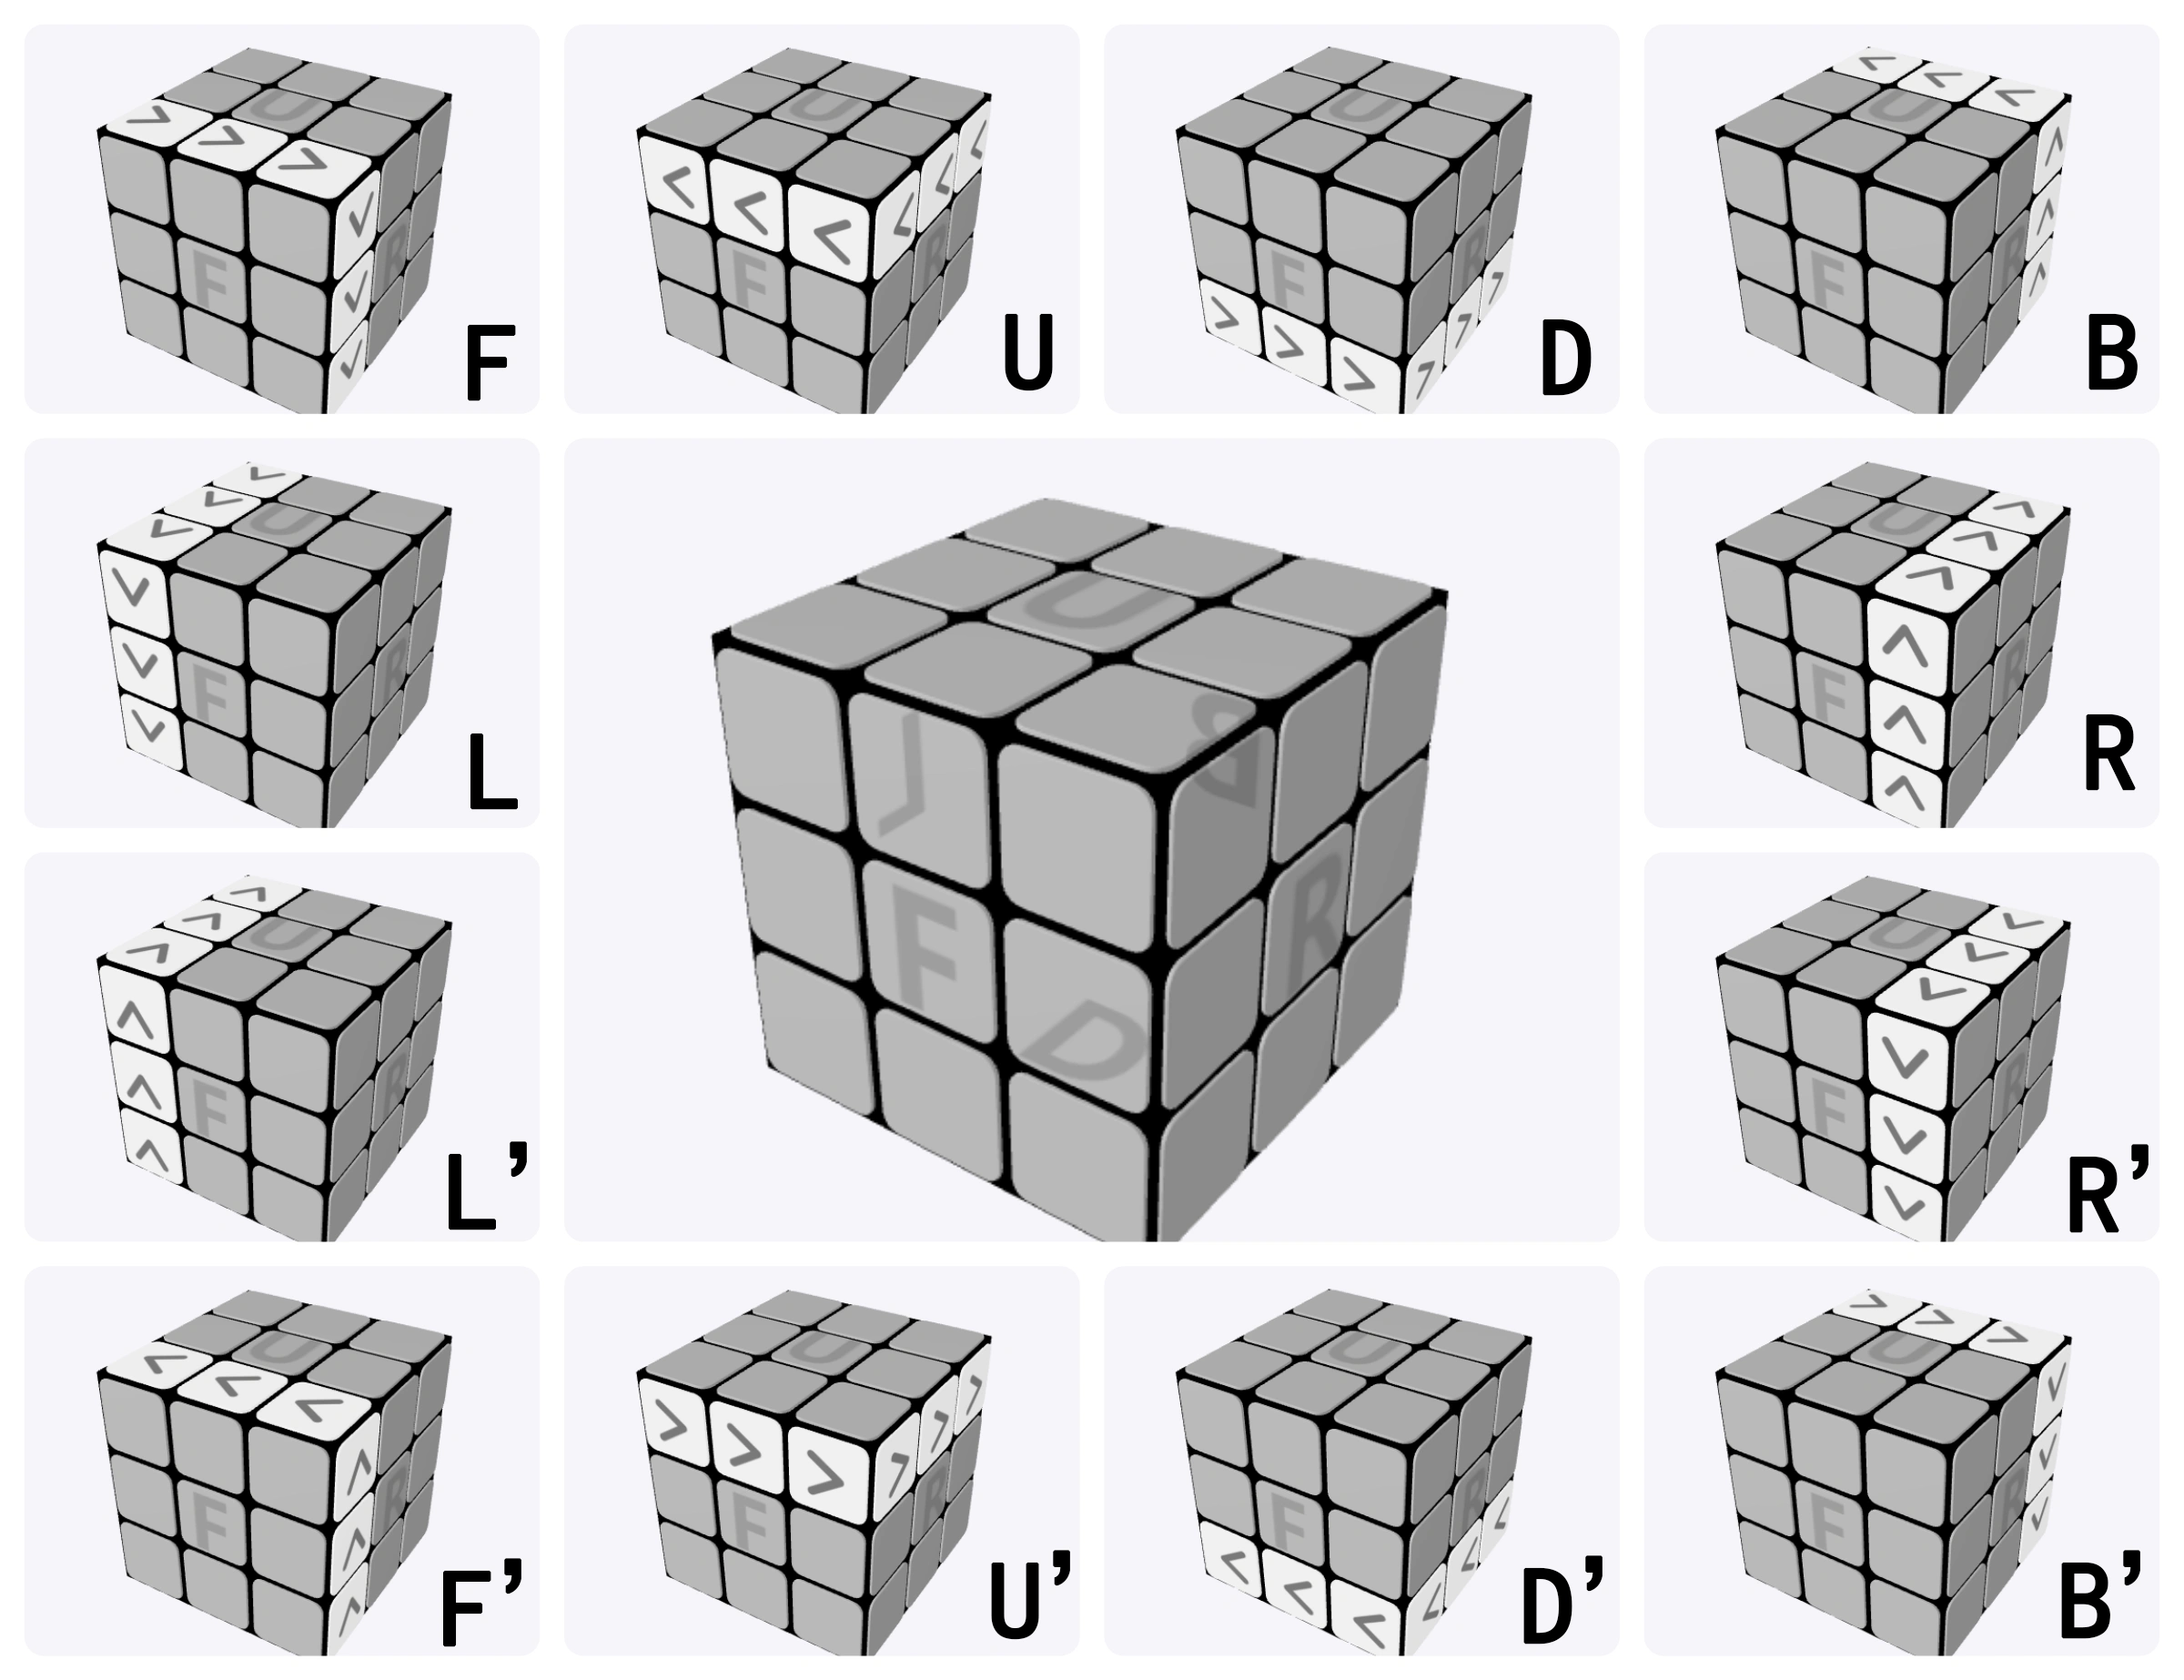
Choose the algorithm that cycles the edges in the direction you need.
You may need to adjust the top layer with a U move before
or after the algorithm.


Be the First to Comment on This Rubik’s Cube Solver